How To Organize, Sort, and Rearrange Products in Shopify

Introduction To Product Organization on Shopify
Whether your Shopify store sells thousands of products or just a handful, it’s in your best interests to organize them effectively. In this article, we’ll discuss the benefits of organizing products on Shopify, explain how to do it, and share our favorite best practices for organizing, sorting, and rearranging products.
Let’s get into it!
Why Does Organizing Shopify Products Matter?
Organizing products on Shopify has a whole range of benefits:
Makes It Easier for Customers To Find the Right Product
Imagine walking into a brick-and-mortar store with no logical product organization.
Fishing rods are displayed next to children’s shoes. Canned food rubs shoulders with bike accessories and garden furniture. To make matters worse, it’s not even consistent: there are enclaves of picture frames and table linens dotted all over the store.
You get the picture.
In all that confusion, how are customers meant to find what they’re looking for?
Conversely, a well-organized store makes it quick and easy for shoppers to track down the right products, which means they’re more likely to buy.
Encourages Upselling and Cross-Selling
By listing similar products next to one another, you naturally encourage shoppers to browse all the available options.
Even if they had their heart set on buying a specific product, they might end up choosing a more expensive one, or even purchasing multiple items.
All of which helps to increase your average order value.
Improves Search Visibility
Google plays a key role in driving shoppers to your Shopify store.
In fact, one-third of all e-commerce sessions come from organic search — more than any other channel.
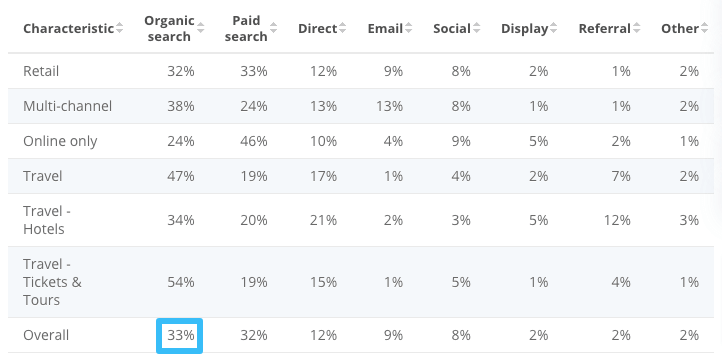
So it’s clearly in your best interests to nail your Shopify store SEO.
One of the most effective tactics is to organize your products into categories (or “collections”, as Shopify calls them), allowing you to target more specific, qualified traffic.
For instance, imagine your store sells denim clothes. While you’d love to be #1 on Google for a broad term like “men’s jeans”, it’s far easier to rank for less-competitive, lower-volume niche terms like:
- Men’s boot cut jeans
- Men’s jeans black
- Levi’s jeans men
What’s more, people searching for niche terms have a clearer idea of what they’re looking for, so they’re more likely to convert.
How To Organize Products On Shopify
So we know that organizing your products effectively helps to increase your store traffic, conversion rate, and average orders. Now, let’s look at four distinct methods to organize your Shopify products:
Categorize Products Via Tags
Product tagging is one way to group similar products in your Shopify store.
Tags can’t be seen by customers. Instead, you can use them to:
- Control which products show up when customers use your site search tool
- Make bulk changes to a specific type of product
For instance, a clothing store might add a “summer” tag to relevant products. If customers search for “summer” on the site, those items will show up. Then, when fall comes around, you can hide all those out-of-season products using a bulk action.
Follow these steps to tag your products:
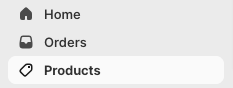
- Log in to your Shopify admin and click Products in the left-hand menu.
- Click on the product you want to tag.
- Scroll down to the Tags section in the right-hand menu.
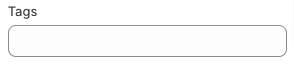
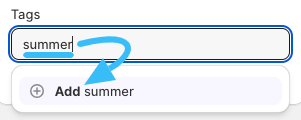
- Now, you can either add an existing product tag…
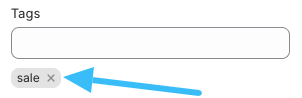
- …or create a new tag by typing it into the Tags box and clicking Add [tag name].
- Click the Save button at the bottom of the screen.
Want to see all the products with a specific tag? Head back to the main Products page, then:
- Click the Search and filter button.

- Click Tagged with.

- Type your tag into the search box to bring up a list of all products with that tag.

Now, you can use the Bulk edit and More actions buttons…

…to perform bulk actions like:
- Editing product prices, vendors, and inventory levels
- Archiving or deleting products
- Adding or removing products from different sales channels, markets, and collections
Learn How to Double (2X) Your Shopify Sales with Product Labels
-
Boost sales by highlighting key features with product badges
-
Increase conversions by promoting scarcity, urgency and social proof
-
Sell more with targeted promotions to increase average order sizes
Use Shopify Collections To Organize Products
Shopify collections are groups of products with similar characteristics.
Every Shopify store has at least one collection page: the All collection (or “catalog” page). By default, it lists every visible product in your store in alphabetical order — although you can customize your Shopify All page by changing which products it displays and the order in which they appear.
Beyond that, you can add an unlimited number of manually curated collections to your Shopify store, plus up to 5,000 automated collections, which automatically display products that meet specific conditions (as defined by you, the store owner). In total, a single automated collection can have up to 60 different conditions, including:
- Product tags
- Price
- Inventory level
- Weight
- Vendor
Here’s how to create a new Shopify collection:
- Log in to your Shopify admin.
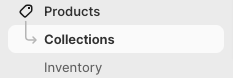
- Navigate to Products > Collections.
- Click Create collection.

- Enter the name of your collection in the Title box.

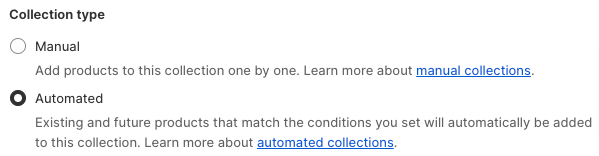
- Scroll down to Collection type and choose whether you’re creating a Manual or Automated collection.
Now, it’s time to choose which products to include in your new collection and how you want to order them.
Pro tip: Check out our companion guide on How to Add Products to Shopify collections for step-by-step instructions.
This process differs depending on whether your collection is manual or automated, so we’ll walk through the steps in separate sections:
Adding and Ordering Products in Manual Collections
- Click Save at the bottom of the page to save your new collection.
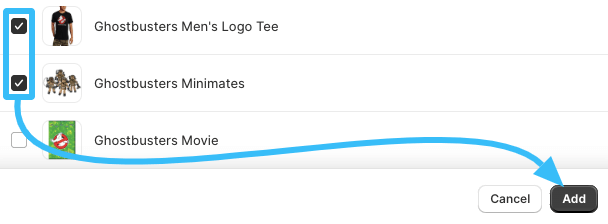
- Scroll down the Products and click Browse.

- Tick all the products you want to include in your collection, then click Add.
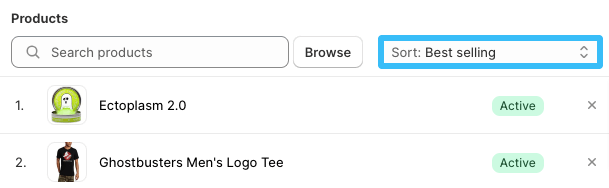
- Use the Sort filter to customize the order in which your products appear on the collection page.
- If you want to control the sort order yourself, select Manually in the drop-down menu and use the drag-and-drop handles (⋮⋮) to move your products around.

Adding and Ordering Products in Automated Collections
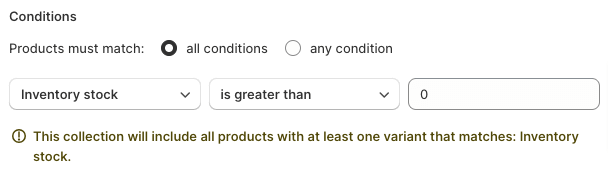
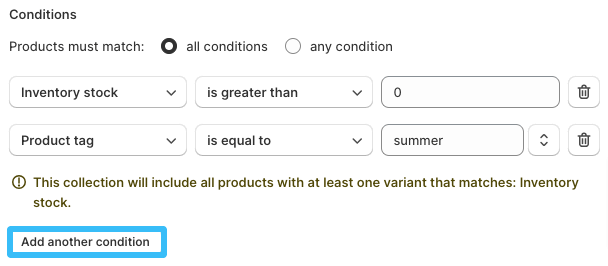
- In the Conditions section, set the criteria for products to be included in your collection. For instance, if you only want in-stock products to appear, add the condition: Inventory stock is greater than zero.
- Click the Add another condition button to add multiple conditions.
- Click Save at the bottom of the page to save your new collection.
- Scroll down to Products and use the drop-down Sort filter to choose how products are ordered within your new automated collection.
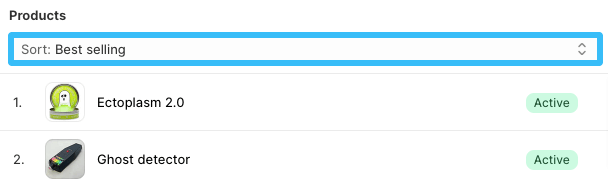
- To change the order yourself, click Manually and use the drag-and-drop handles (⋮⋮) to move products up or down the list.
Use Third-Party Shopify Apps
There are various third-party apps that help you organize products in your Shopify store. Let’s look at some of the options:
| App name | Price | What does it do? |
| Best Seller Insights by Burst | From $29/month for up to 1,000 orders per month. Offers a 14-day free trial. | Maximize sales by sorting collection pages by recent best-sellers, rather than all-time. Customize best-seller tracking by number of weeks and formula (total units, total orders, gross profit). |
| Bestsellers reSort | Free to install. Prices start at $9.99/month. | Use comprehensive sorting to create a custom order of products that updates automatically. Add featured products to the top of collections pages. |
| Category & Collection Sort | From $19/month for up to five managed collections. Offers a 14-day free trial. | Build, sort, and [A/B test](/guides/shopify-ab-testing/) automated collection pages. Sort collections using analytics data and personalization. |
Best Practices for Organizing, Sorting, and Rearranging Products in Shopify
Whatever method — or combination of methods — you use to organize products in Shopify, there are some best practices to bear in mind. Use these tips and tricks to convert more store visitors and increase upsells and cross-sells.
List More Attractive Products First
Between mid-2015 and early 2019, the average e-commerce session duration dropped by:
- 17% on desktop
- 33% on mobile
- 29% on tablet
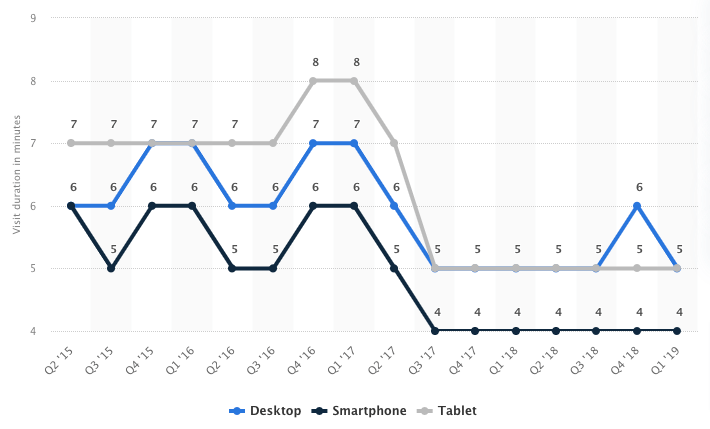
And it’s a fair bet that session lengths have reduced even further since then.
With attention spans becoming ever shorter, it pays to list your most attractive products first. That way, shoppers won’t need to scroll through a list of less-desirable items to find something they’re actually likely to buy.
Pro tip: While Shopify lets you order collections by best-selling products, this function is based on all-time best-sellers. Best Seller Insights by Burst, on the other hand, lets you sort collection pages by recent best-sellers. So if you’ve got a hot new product that’s flying off the shelves, it’ll automatically appear at the top of any collections it’s listed in.
Group Related Products Together
The whole point of tagging products and creating custom collections is to group relevant products together.
Not only does this make it easier for shoppers to find what they’re searching for, but it also increases the chances that they’ll upsell or cross-sell themselves by choosing a more expensive product or buying multiple products.
There are countless characteristics you can use to categorize your products, but popular options include grouping by:
- Vendor
- Product type
- Product options (e.g. gender, age, color, size, price)
Pro tip: Remember, you can build automated collections based on up to 60 different conditions. So if you want one page for men’s jeans priced under $50 and another for those priced at $50+, you can do it by grouping relevant products together into separate collections.
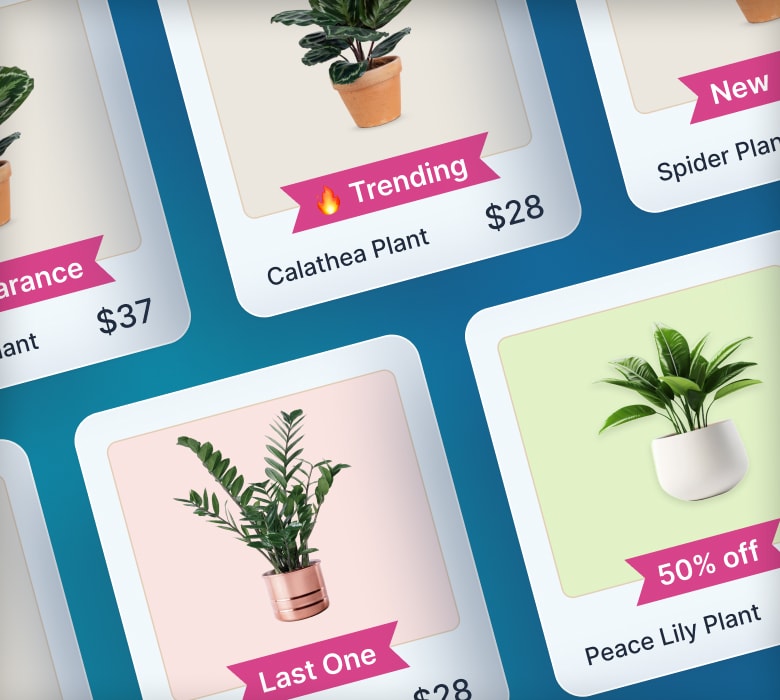
Create Separate Product Collections for Special Offers
As well as building Shopify collections based on specific product characteristics, you should also create them for individual special offers.
You can even have multiple deal-specific collections on your site simultaneously. For instance, Best Buy has dedicated collections for holiday deals, top deals, and deals of the day:

This tactic makes it easy for bargain-hunting customers to track down your best offers. And it also gives you a deal-specific landing page to use in ad campaigns.
Let’s look at some of the collections you can create to promote special discounts and must-see products:
Special Offers
- Clearance deals: Create a clearance collection to display discounted out-of-season and/or end-of-life products.
- Doorbusters: This collection should include products that have been heavily discounted as part of a special promotion (like your Black Friday / Cyber Monday sale).
- BOGO deals: Buy-one-get-one promotions allow customers to unlock some kind of discount or perk when purchasing specific products. Examples include buy one, get one free and buy one, get one XX% off.
Pro tip: For more ideas on special offers, check out our guide to Shopify discounts.
Featured Collections
- Staff picks: Round up your team’s favorite products in a dedicated collection. This tactic is especially relevant for product categories that are heavily influenced by social proof, such as fashion and music.
- Best sellers: Display your best-selling products throughout your store to help them sell even better. This also adds some social proof and can help increase conversions.
- New arrivals: Everyone loves fresh products, so group yours together on a new arrivals collection page.
Conclusion: How To Organize Products on Shopify
Shopify offers multiple options for organizing products.
You can use product tags to improve your site search functionality, create customized collections to house groups of related items, and leverage dedicated apps like Best Seller Insights by Burst to effectively showcase your most popular products.
All of which means your customers can easily find the products they’re searching for, making for a smoother, more satisfying user experience.
And when shoppers are satisfied, they’re more likely to come back to your store and buy again.
FAQ: How To Organize Products on Shopify
What Is the Best Way To Organize Products on Shopify?
The best way to organize products on Shopify is to make it as easy as possible for customers to find your most attractive products. Do this by:
- Categorizing products via tags so they show up in relevant site searches.
- Organizing products into automated and/or manual Shopify Collections based on characteristics like price and inventory level.
- Using third-party Shopify apps like Best Seller Insights by Burst, which lets you sort collection pages by recent — rather than all-time — best-sellers.
How Do I Create an All Products Collection in Shopify?
Every Shopify store has an “all products” page, known as the Shopify All collection or catalog page.
You can find yours by adding “/collections/all” to the end of your domain name (e.g. examplestore.com/collections/all).
To replace your existing All collection page with a new one, follow these steps:
- Log in to your Shopify admin.
- Navigate to Products > Collections.
- Click Create collection.
- Type “All” in the Title box.
- Click the Save button.
How Do I Change the Default Sort Order For Product Collections in Shopify?
Shopify allows you to sort products by multiple methods, including best-sellers, product title (A – Z or Z – A), price, and product age. Here’s how:
- Log in to your Shopify admin.
- Navigate to Products > Collections.
- Select a collection.
- Scroll down to the Products section and choose your desired sort order from the drop-down menu.
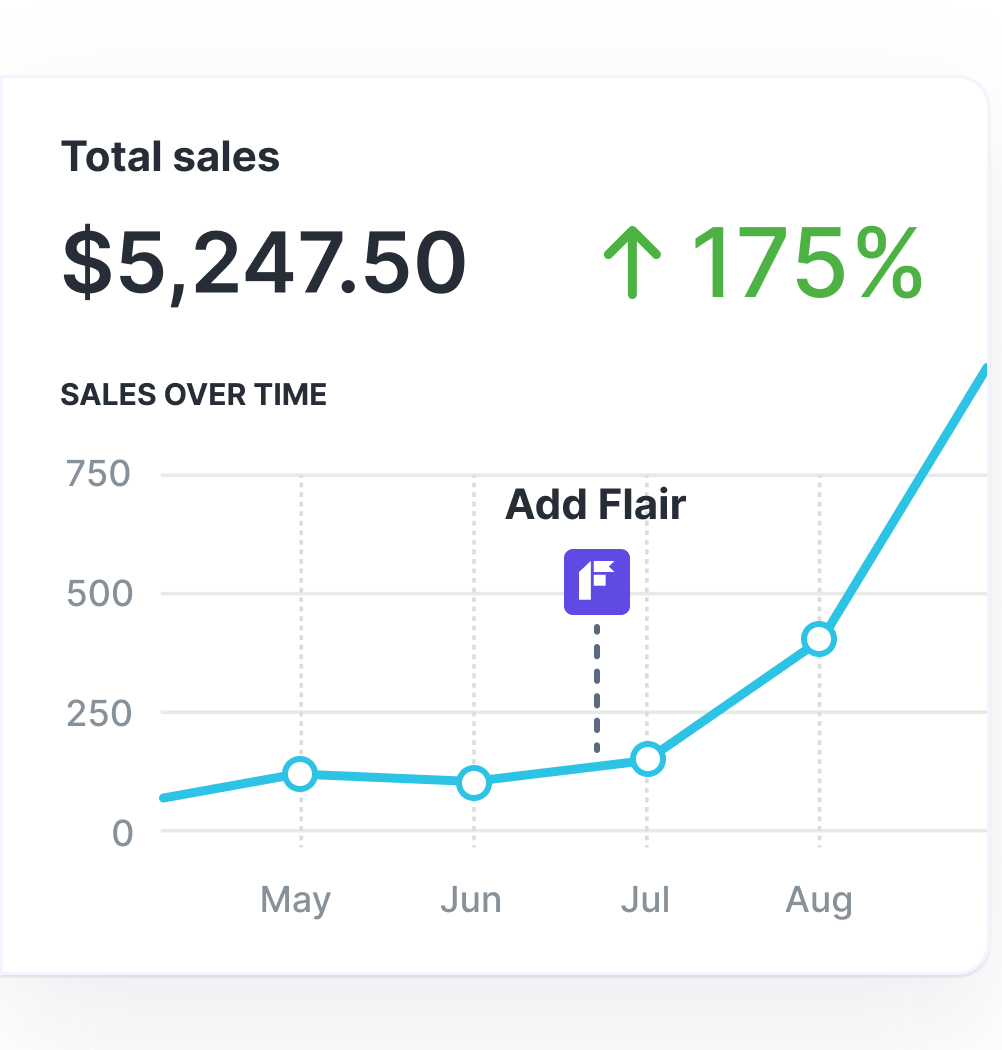
Grow Your Shopify Sales by over 175% with Flair
-
Increase sales using product badges and sales banners
-
Maximize conversions with scarcity, urgency and countdown timers
-
Automate promotions with targeted rules and scheduling