Shopify Hacks: 18 Secrets to Skyrocket Sales

As a Shopify store owner, you likely have a simple goal: sell more stuff.
While there’s no shortage of ways to achieve it, you’ll only get so far using the same tips, tricks, and tactics as everyone else.
With that in mind, we’ve rounded up 18 of our favorite lesser-known Shopify hacks, covering everything from nailing your store’s SEO to choosing the right pricing strategy.
Let’s get into it…
Pick the Right Shopify Template
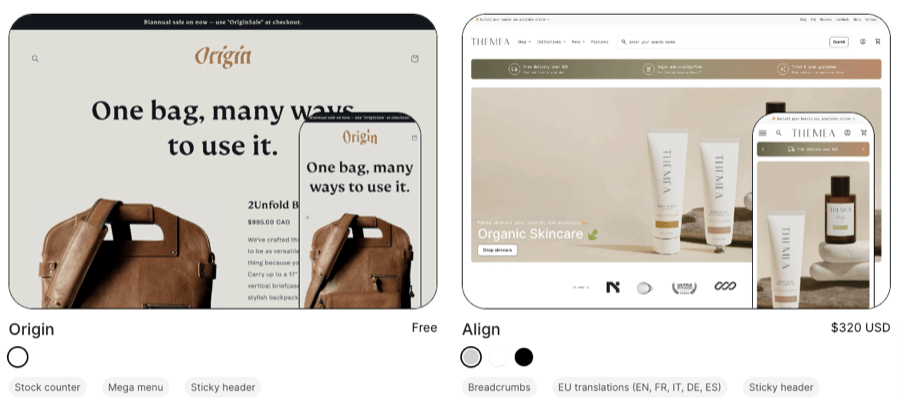
At time of writing, Shopify offers 150 free and paid store themes (and you can find thousands more from third-party vendors like ThemeForest and Creative Market).
With all that choice, it can be tough to pick the right theme for your store. And remember that you’re not just looking for a pretty face — your chosen theme needs to provide all the features you require to guide customers on the path to purchase.
Look for themes that tick the following boxes:
- Responsive: Your theme should be fully responsive, enabling shoppers to access it on any device.
- Cross-browser compatible: Similarly, site visitors should be able to enjoy the full functionality of your store, regardless of which web browser they’re using.
- Easy to navigate: Check out the theme’s live demo mode before making your final choice to ensure it’s easy to navigate.
- Easy to edit: Unless you have strong coding and web design skills, you’ll need a drag-and-drop editor to help you build attractive web pages and onsite elements.
- Fits your catalog: Some themes only work with smaller catalogs (say 1 – 9 products), so make sure your preferred theme is large enough to fit all the products you sell.
- Has the right features: Does your theme need age verification? Breadcrumbs? In-menu promos? Draw up a list of must-haves (and nice-to-haves) to help guide your search.
- Niche-appropriate: Some themes are generic, but others are designed with specific audiences in mind. Use the filters in Shopify’s theme store to find one that matches your niche.
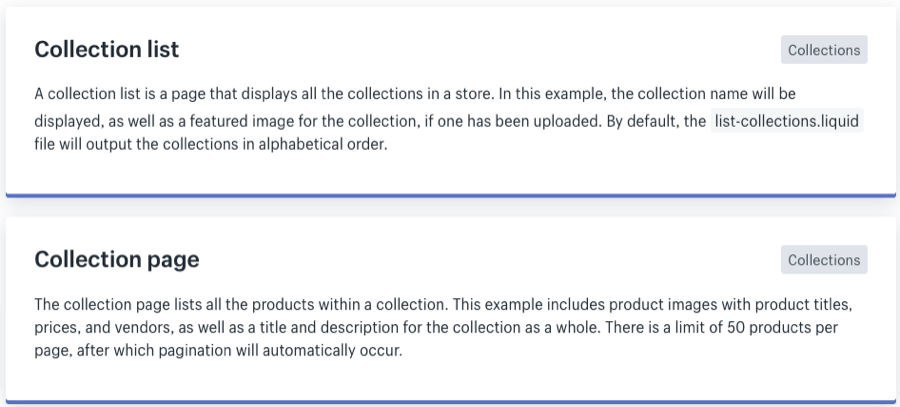
Utilize Shopify's Liquid Code for Advanced Customizations
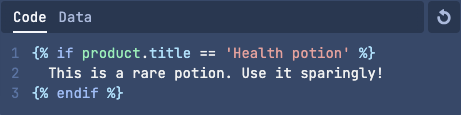
Liquid is Shopify’s template language. It allows Shopify users to:
- Build a template for hosting static content
- Dynamically insert information depending on where the template is rendered
For instance, you might create a product template to host the product’s title, image, price, and other attributes, which are dynamically rendered based on the product being viewed.
Editing your theme code — most of which contains Liquid code — allows you to make detailed changes to your online store, such as customizing the content and appearance. To do it, just follow these steps:
- Log into your Shopify admin.
- Navigate to Online Store > Themes.
- Click ... > Edit code.

When you click any file in the left-hand directory list, it’ll open in the code editor on the right:

You can now tinker with the code to your heart’s content. Any files you edit will appear in the directory with a handy dot next to them, helping you keep track of your changes:
So what exactly can you do with this newfound ability to tweak your Liquid code? Common customizations include:
- Custom announcement bars
- Accessible pagination
- Data-driven product recommendations
- Breadcrumb navigation
- Checkout forms
Fortunately, you don't need to be a coding whizz to add all that helpful functionality: you can steal other people’s work from Shopify’s Liquid code examples resource.
Before you start blindly editing your code, be sure to duplicate your Shopify theme to create a backup copy in case you need to revert your changes.
Optimize Your Shopify Store's SEO
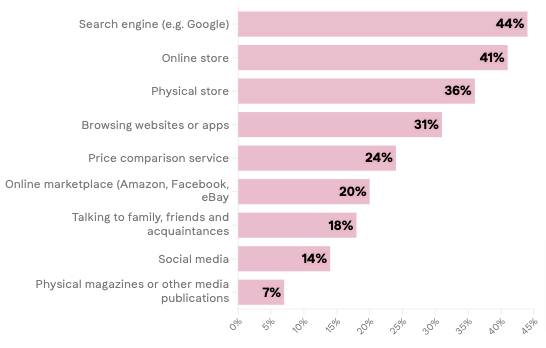
Given that search engines are the #1 source of retail customer journeys, it pays to invest in your store’s SEO.
Here are six areas you should focus on in your optimization efforts…
Optimize Your Store Structure
A high-converting Shopify store starts with an intuitive site structure, with a logical flow that guides shoppers along the path to purchase.
For many stores, the perfect structure looks like this:
- Homepage > Category pages > Product pages
However, if you have a broader range of products, you can add an extra layer as follows:
- Homepage > Category pages > Sub-category pages > Product pages
Achieve a Competitive Edge Through Keyword Research
From your homepage to your collection and product pages, Shopify offers plenty of opportunities to optimize your site by adding keywords — the types of words and phrases for which your customers are searching.
Here’s a simple, step-by-step process for finding relevant keywords:
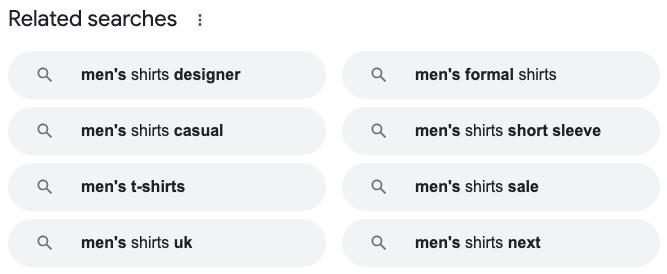
- Choose a seed keyword: a broad, top-level query that relates to your niche and the products you sell (e.g. a men’s clothing brand might choose “men’s shirts”).
- Google your seed keyword, then use the Related searches section at the bottom of the page to identify more specific (and therefore less-competitive) terms.
- Use a tool like Ahrefs, Semrush, or Ubersuggest to find even more related keywords.
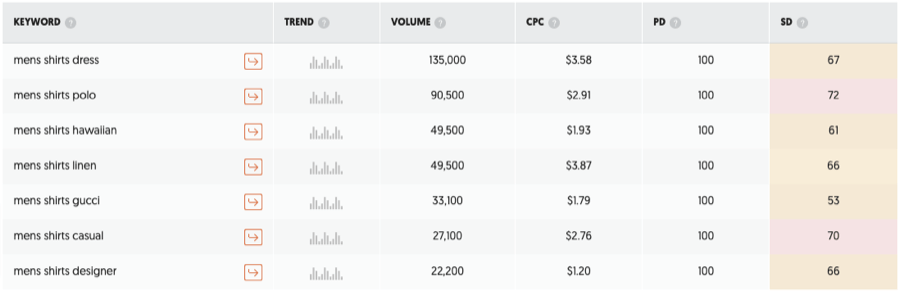
- Continue the process with new keywords you’ve found (e.g. you might want to use “men’s shirts casual” as your next seed keyword).
- Map your findings to specific pages based on your site hierarchy (e.g. Men’s shirts > Men’s shirts casual > Men’s casual dress shirts).
Keyword research takes time, but it’s an extremely effective way to bring in more search traffic. Once you’ve defined your target keywords, add them to the metadata and page content on the relevant pages, focusing on one main keyword per page.
Optimize Metadata
Speaking of metadata…
While it might not be the sexiest element of e-commerce marketing, optimizing your metadata helps your products show up in relevant search results.
When we say “metadata”, we’re predominantly speaking about the two main elements that you’ll find on every search engine results page:
- Page titles
- Meta descriptions
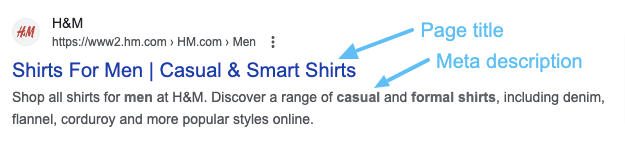
You want those elements to incorporate the page’s main target keyword, while the meta description should also include a call to action that prompts searchers to click through (think of it as a kind of ad for your page).
Shopify allows you to edit your store's metadata. To tweak yours, follow these steps:
- Log into your Shopify admin.
- Navigate to Online Store > Preferences.
- Edit the metadata for your homepage.
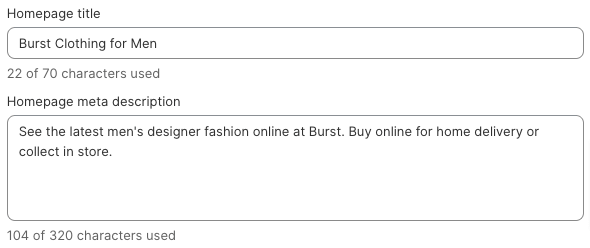
- Repeat the process for other top-level pages by going to Online Store > Pages and clicking Edit website SEO to bring up the page title and meta description editor.
Improve User Experience
Over half of online shoppers expect e-commerce pages to load in three seconds or less, while one in five say slow-loading pages are their biggest source of online shopping dissatisfaction.
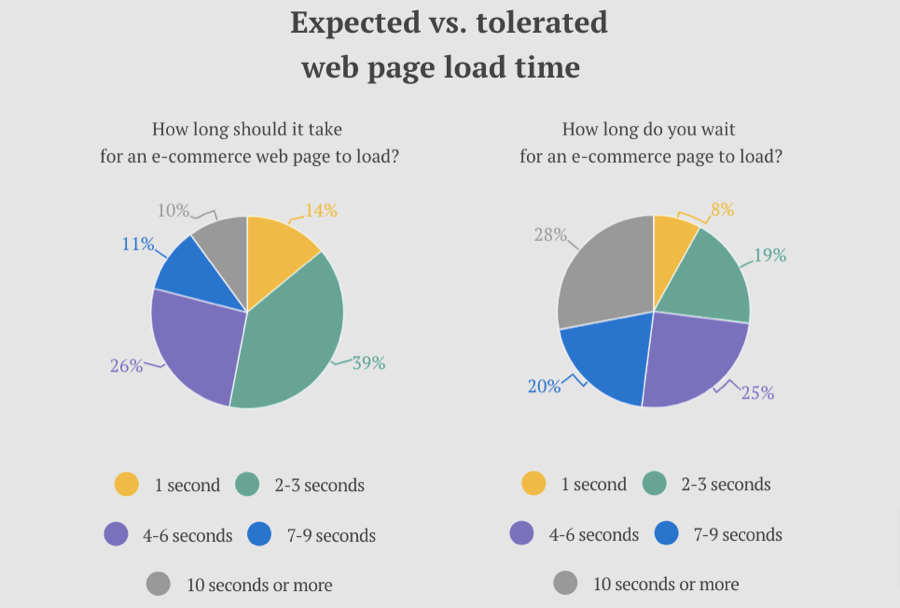
So it definitely pays to invest in your Shopify store speed and user experience.
There are lots of ways to do this, but start by:
- Building a fast, mobile-responsive website
- Using small, keyword-optimized images
- Getting rid of any unnecessary Shopify apps
- Removing any image sliders from your site
For more tips, check out our guide on how to optimize your Shopify store speed.
Avoid Duplicate Content
Duplicate content is a common problem in the e-commerce world.
For instance, you might have multiple pages for different color variants of the same product, so it’d make sense to write a single product description and add it to each of those pages.
However, search engines favor pages with distinct information. That means if your pages are crammed with duplicate content, they essentially have no SEO value.
Use tools like Siteliner and SEO Review Tools’ Duplicate Content Checker to identify duplicate content on your site. If you want those pages to rank, make sure they have unique content.
Add Your Sitemap to Google Search Console
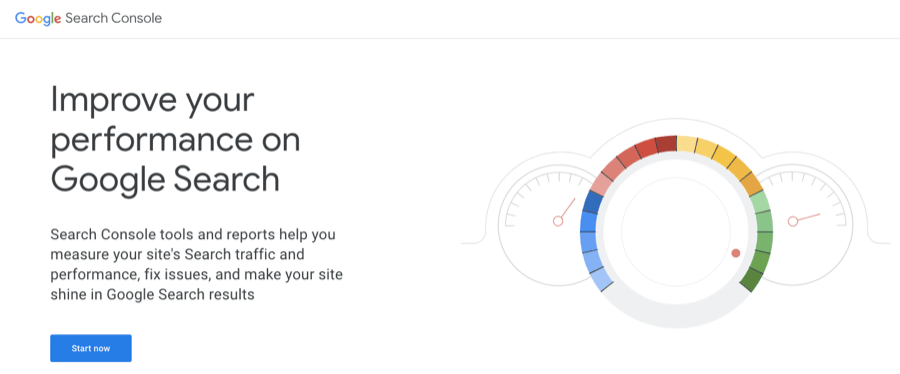
Google Search Console is a free platform incorporating various website performance-related tools. Adding your sitemap to Search Console allows Google to use it as a directory for finding and crawling your pages.
Before uploading your sitemap, you need to create a Search Console account, then confirm yourself as the store owner. Part #1 is easy (just visit the Search Console homepage and follow the onscreen prompts); part #2 is a little more fiddly…
How to Verify Shopify Store Ownership in Google Search Console
- If relevant, disable password protection for your online store by logging into your Shopify admin, going to Online Store > Themes, and clicking Remove password. You can reactivate it again once you’ve verified your site.
- Log in to Search Console, click the hamburger button (≡), then select Add property from the drop-down menu.
- Find the Select property type dialog box and select URL prefix, then add your store domain, including the https://.
- Click Continue.
- Select HTML tag in the Verify ownership window.
- In the HTML tag section, click Copy to copy the full meta tag, including the < and >.
- Log in to your Shopify admin and go to Online Store > Themes.
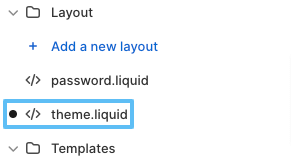
- Click ... > Edit code.
- In the Layout section, click theme.liquid.
- Paste your copied meta tag into a blank line in your Liquid code, directly beneath the opening <head> tag.

- Click Save.
- Go back to Search Console and click Verify.
Once you’ve verified yourself as the site owner, you can get on with submitting your sitemap to Search Console…
How to Submit Your Shopify Store Sitemap to Google Search Console
- Log in to Google Search Console and navigate to Indexing > Sitemaps.
- In the Add a new sitemap section, paste the file name of your domain’s sitemap file (e.g. https://flair-demo.myshopify.com/sitemap.xml).
- Click Submit.
Bear in mind that if you’re on the Shopify Basic plan or higher and use international domains, you’ll have to submit sitemap files for each domain.
Once you’ve submitted your sitemap file(s), Google will use them to crawl and index your store. Google doesn’t make any guarantees about how long this process takes, so you’ll just have to be patient!
Optimize Your Images
Optimizing your store images ensures they display correctly and load quickly, helping you deliver an excellent user experience. And it also gives your images a better chance of appearing in search results, boosting your site traffic.
Here are a couple image optimization best practices to consider:
- Compress your images. Boost your site speed by shrinking images (without sacrificing quality) using tools like TinyIMG , Image Compressor, and TinyPNG.
- Optimize image metadata. Add relevant keywords to your image file names and alt attributes to help search engines understand what they’re about.
- Use the right image dimensions. Shopify’s image dimensions vary based on the type of image (e.g. product and collection images are square, whereas banner images are rectangular). Check out our Shopify image size, format, and optimization tips for a full breakdown of ideal image dimensions.
Learn How to Double (2X) Your Shopify Sales with Product Labels
-
Boost sales by highlighting key features with product badges
-
Increase conversions by promoting scarcity, urgency and social proof
-
Sell more with targeted promotions to increase average order sizes
Set the Right Pricing Strategy
Getting your price strategy right helps your products stand out from the competition, thereby boosting sales and revenue.
There are three main competitive pricing models you can follow:
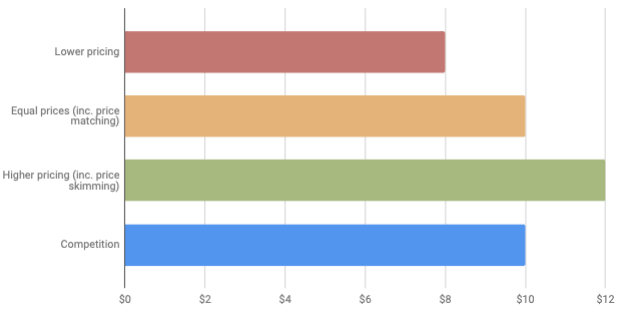
- Lower pricing: This approach reduces your margins, but helps you increase sales — especially if your products are of similar quality to your rivals.
- Equal pricing: Matching your competitors’ prices allows you to differentiate on other factors, such as product quality and customer experience.
- Higher pricing: Charging more for your products makes them feel more exclusive, helping you attract higher-spending customers.
There are pros and cons to each approach, so you’ll need to thoroughly assess the market and consider your pricing goals before choosing a pricing strategy.
For advice on choosing the right strategy for your store, check out our guide to competitive pricing.
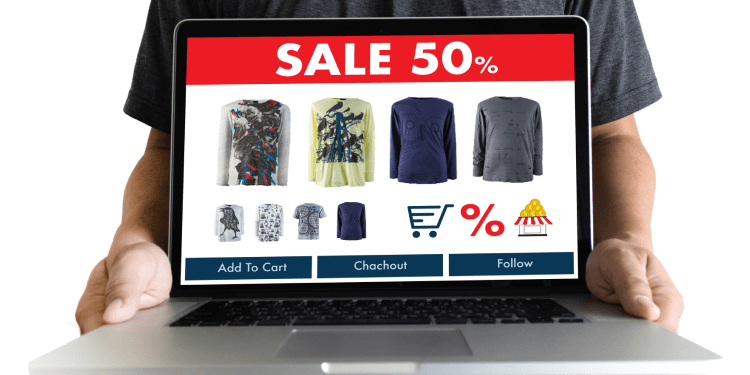
Get Clever With Your Promotions
An intelligent promotion can increase sales, bring in new customers, and engage existing ones, with two-thirds of consumers saying they’ve made an unplanned purchase after finding a coupon or discount code.
There are way more online promotion types than a simple flash sale. Popular examples include:
- Seasonal & holiday discounts: These are planned to coincide with key shopping events and holidays, such as Valentine’s Day and Christmas.
- Customer segment discounts: These permanent or limited-time discounts are aimed at specific customer demographics, such as students or senior citizens.
- Product bundling: Selling multiple products as a discounted bundle can convince shoppers to try stuff they wouldn’t normally buy.
- Limited-time offers: This tactic involves running promotions for a set period (say 48 hours), prompting customers to take action fast.
Want more tips on running effective promotions? Read our guide to e-commerce promotion tactics.
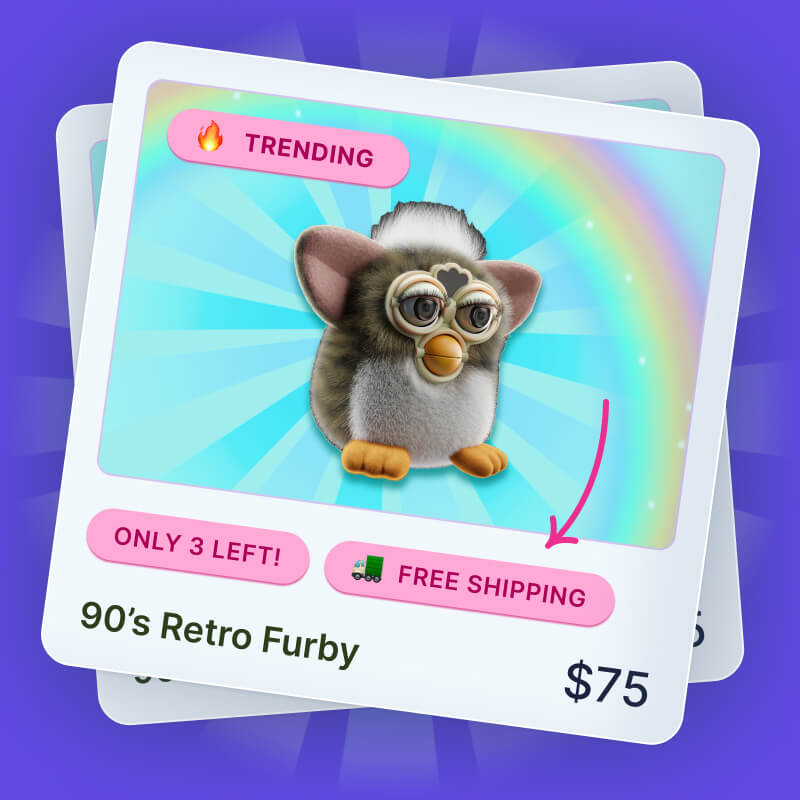
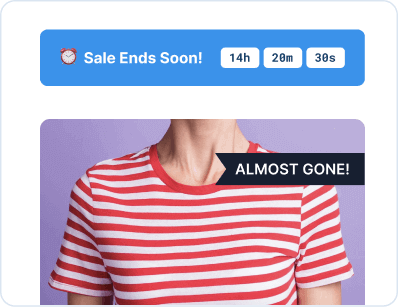
Create Urgency on Your Store
Instilling a sense of urgency in customers is one of the most effective ways to boost your conversion rate and drive sales.
In the e-commerce world, creating urgency is all about making customers feel like they’ll miss out on an incredible deal if they don’t act right now. You can do it by:
- Imposing deadlines: Give shoppers a specific date and/or time in which to access your offer. Visualize your deadline by adding a countdown timer to your site.
- Using actionable language: Words and phrases like “hurry”, “last chance”, and “almost gone” can spark customers into action and speed up the decision-making process.
- Creating scarcity: Warn customers when you’re running low on specific products to increase the perceived value of those products.
Our Flair app helps you create urgency, letting you use automated product badges to highlight low stock and limited-time offers.
Check out our guide on how to create sales urgency on your e-commerce store.
Put a "Shop Now" Button on Your Homepage
Your whole task as a Shopify owner is to guide visitors from top-level landing pages to product pages (and then to your checkout pages) as smoothly as possible.
Make the user journey feel seamless by adding “Shop Now” CTAs to your homepage:
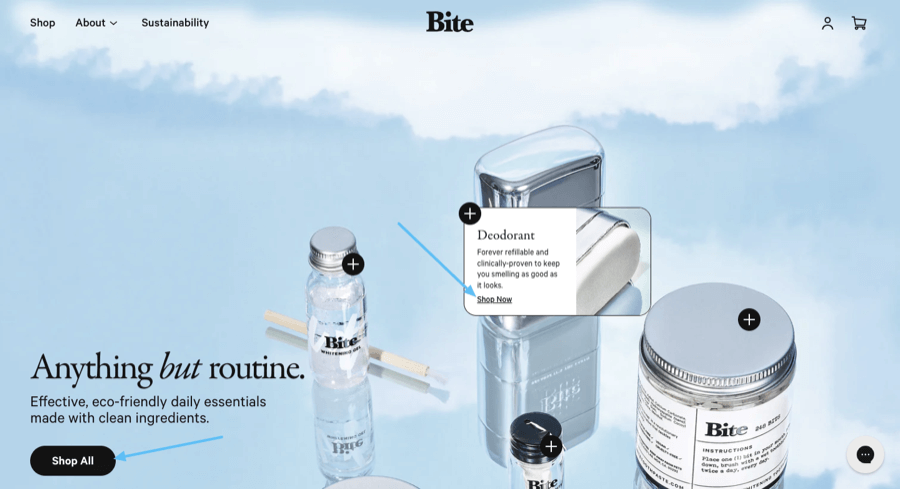
While some shoppers will naturally require a little time before they’re ready to convert, adding shopping-oriented CTAs to your homepage helps drive more sales from impulse buyers.
Add a Welcome Popup to Your Site
Welcome popups are one of the most effective ways to capture email addresses from website visitors.

How does that help increase sales?
Easy: because email marketing delivers an average return of $36 for every $1 spent. The more emails you capture, the more opportunities you have to target would-be customers with promotions and personalized product recommendations.
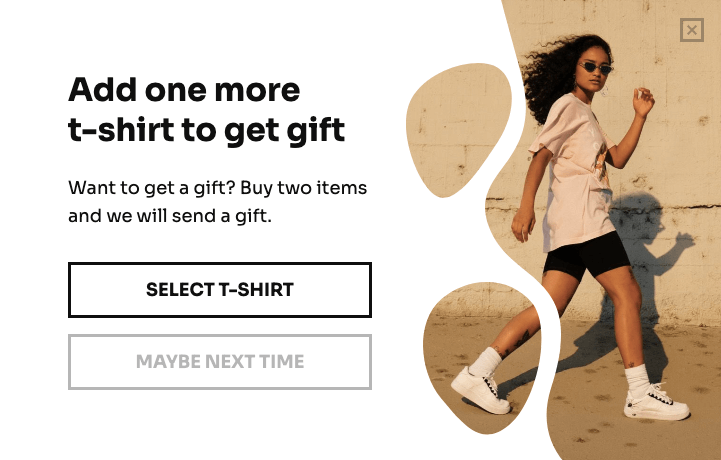
Launch a Cross-Sell Popup (or Email)
Cross-selling is about encouraging customers to buy additional products, thereby boosting your average order value.
You can prompt cross-sells through onsite popups during the shopper’s buying journey…
…or by sending post-purchase emails that recommend complementary products or highlight discounts.
Also, try adding “you may also like” recommendations or “complete the set” messages to your product pages to encourage visitors to explore other potential purchases:
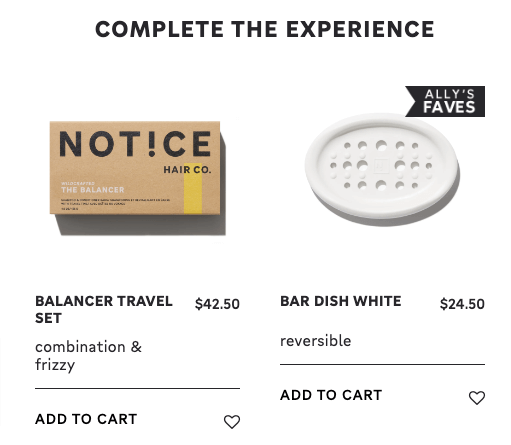
For more tips like this, read our guide to increasing Shopify conversion rates.
Create an Exit Intent Popup
Another way to leverage popups is to target users just as they’re about to leave your site.

Fact is, most first-time visitors won’t be ready to buy straightaway. So it makes sense to extract the maximum possible value from your store traffic by capturing the shopper’s email address before they split.
That way, you can reach out to them with promotions and product recommendations to coax them back when they’re in the buying mood.
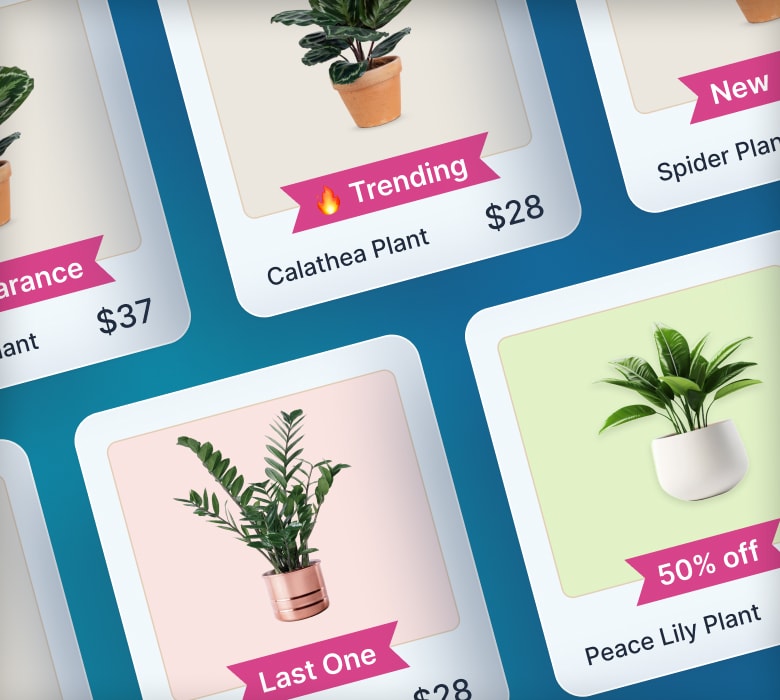
Add Product Badges to Products
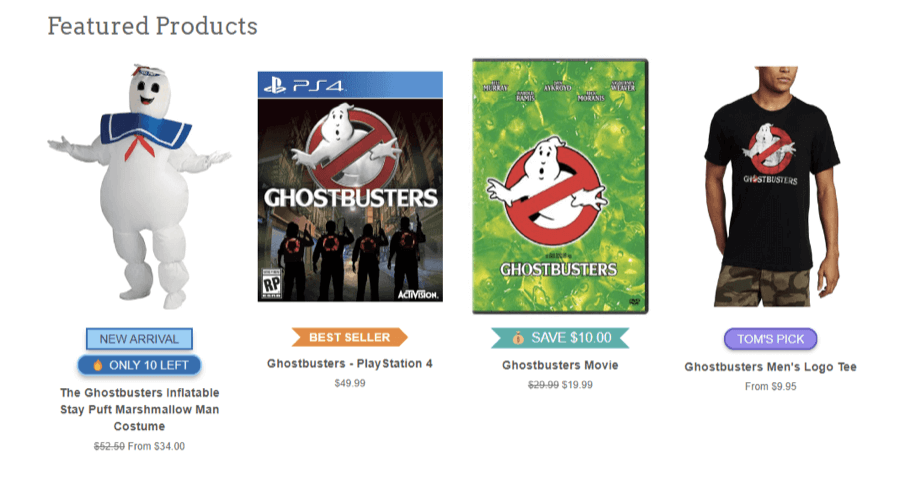
Product badges — also known as labels and stickers — are one of our favorite methods for increasing sales on Shopify, helping you:
- Promote sales and discounts
- Highlight your most attractive products
- Showcase product features and benefits
- Create scarcity and urgency
You can place product badges pretty much anywhere you like — below the product title, within product images, next to the price, and more. However, we recommend placing them in prominent positions to help draw the shopper’s eye.
New to product badges? Read our guide to adding and customizing product labels and badges on Shopify.
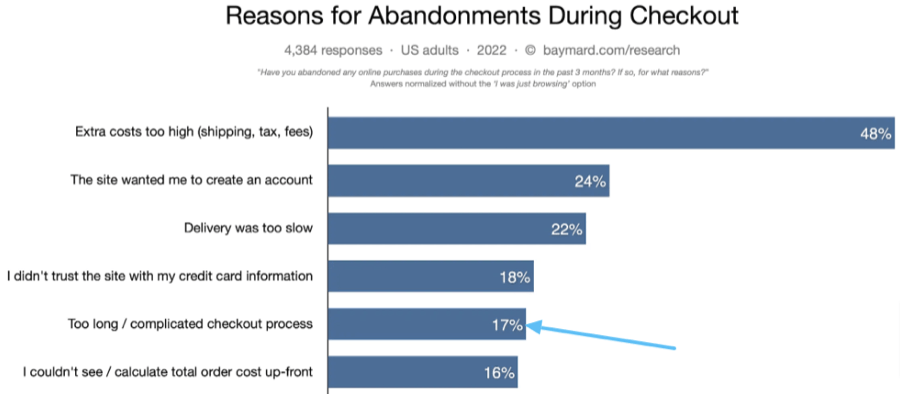
Simplify the Checkout Process
One in six online shoppers who abandon their shopping carts do so because the checkout process was too long or complicated, according to the Baymard Institute.
So it’s in your best interest to make the checkout process as pain-free as possible by:
- Adding a tick box that lets customers use the same information for billing and shipping
- Auto-filling the name, email, and address fields for returning shoppers
- Including a Continue Shopping button on your checkout page so customers can add further items if necessary
One last tip: be sure to collect the customer’s email address at the start of the checkout process.
That way, if they do abandon their shopping cart, you can attempt to win them back with an abandoned cart email.
Use a Great Discount Strategy
Four-fifths of consumers say they feel encouraged to make first-time purchases from a brand after finding an attractive promotion or discount, while over nine in 10 would place repeat orders from retailers offering compelling discounts.
All of which means that nailing your discount strategy plays a key role in boosting sales from both new and existing shoppers.
Shopify offers various discount types:
- Percentage discounts that give shoppers a proportion off their purchase price.
- Fixed-sum discounts that offer a fixed cash reduction.
- Buy X, get Y discounts encourage shoppers to hit a specific spending threshold to unlock the offer.
- Free shipping discounts offer free shipping, often when the customer spends a certain amount.
Targeting store visitors with the right discount at the right time can persuade them to buy now rather than checking out the competition.
Find out more about the different options (and how to use them) in our complete guide to Shopify discounts.
Link Shopify to Tiktok
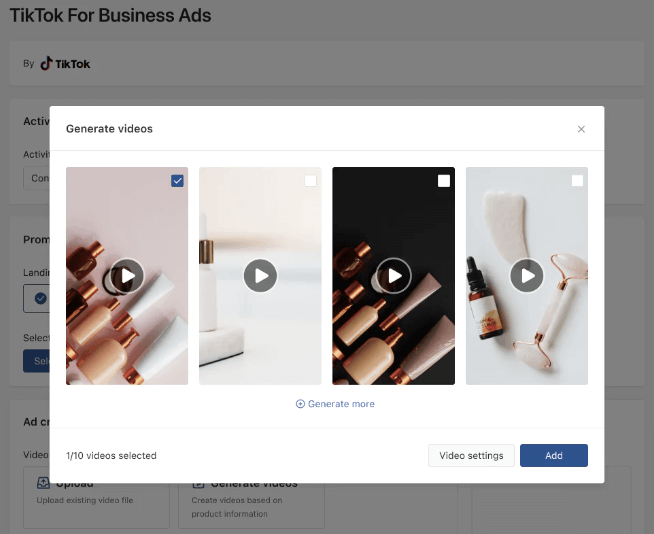
Two-thirds of TikTok users say the platform inspires them to shop, even when they weren’t planning to buy anything.
So if your audience loves TikTok (and with almost 1.5 billion people using the platform, they probably do), it makes sense to connect your TikTok account to your Shopify store. That way, customers will be able to buy your products without leaving the TikTok app.
Neat!
Linking Shopify to TikTok is a pretty simple process that basically involves:
- Upgrading to a (free) TikTok business account
- Visiting the Shopify App Store and searching for TikTok
- Clicking Add app and selecting the relevant Shopify account
For a detailed walk-through, check out our guide on how to link Shopify to TikTok.
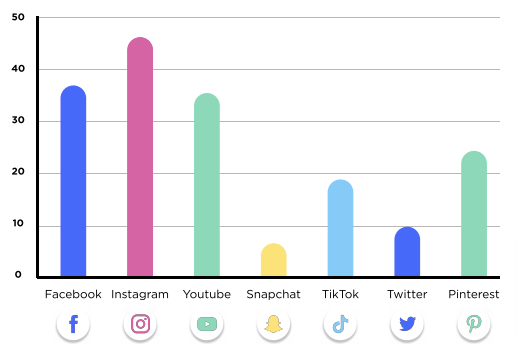
Create a Shoppable Instagram Feed
TikTok isn’t the only e-commerce-friendly social media site.
Indeed, one global study found that Instagram is the most popular social media platform for buying inspiration, ahead of Facebook and YouTube.
Shopify apps like Snapppt turn your Instagram account into a shoppable feed by tagging products and syncing them with your Shopify store, allowing shoppers to add items to their cart and choose their preferred size, color, and other variations.
It’s all about building a more connected user experience for your social followers.
Create a Loyalty Program
Loyal customers are a Shopify store owner’s best friend, with repeat customers generating 44% of e-commerce revenue and 46% of orders — despite making up just 21% of the average brand’s customer base.
One way to turn more first-time buyers into loyal returning customers is to start a loyalty program, which provides incentives for repeat purchases.
E-commerce loyalty programs often work on a points-based system that provides more attractive rewards for higher-spending customers:
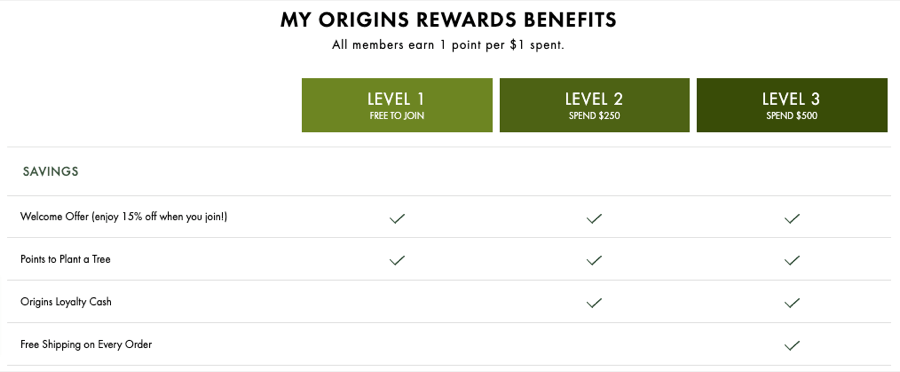
Making it easy (and cheap) to unlock entry-level benefits encourages shoppers to sign up and work toward those juicy top-tier incentives — which means more sales.
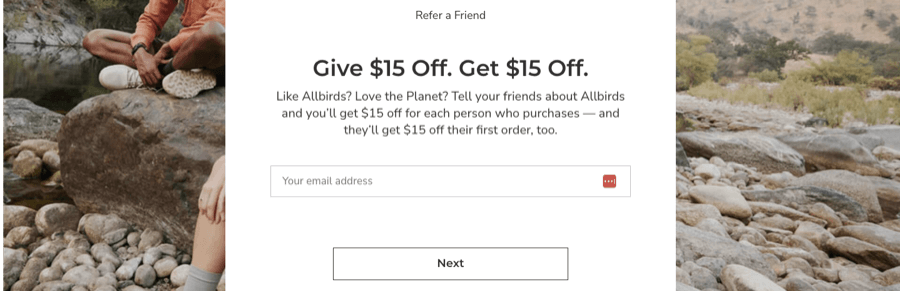
Create a Referral Program
Another way to extract more value from your existing customers is to start a referral program that encourages them to recommend friends and family to your Shopify store.
These programs typically provide incentives for both the referrer and the person they refer.
For instance, Allbirds offers customers a $15 discount for each referral who makes a purchase — and their referrals also get $15 off their first order:
And the best news?
Research shows that customers referred by other customers:
- Generate higher profit margins
- Are more loyal
- Show a higher customer lifetime value
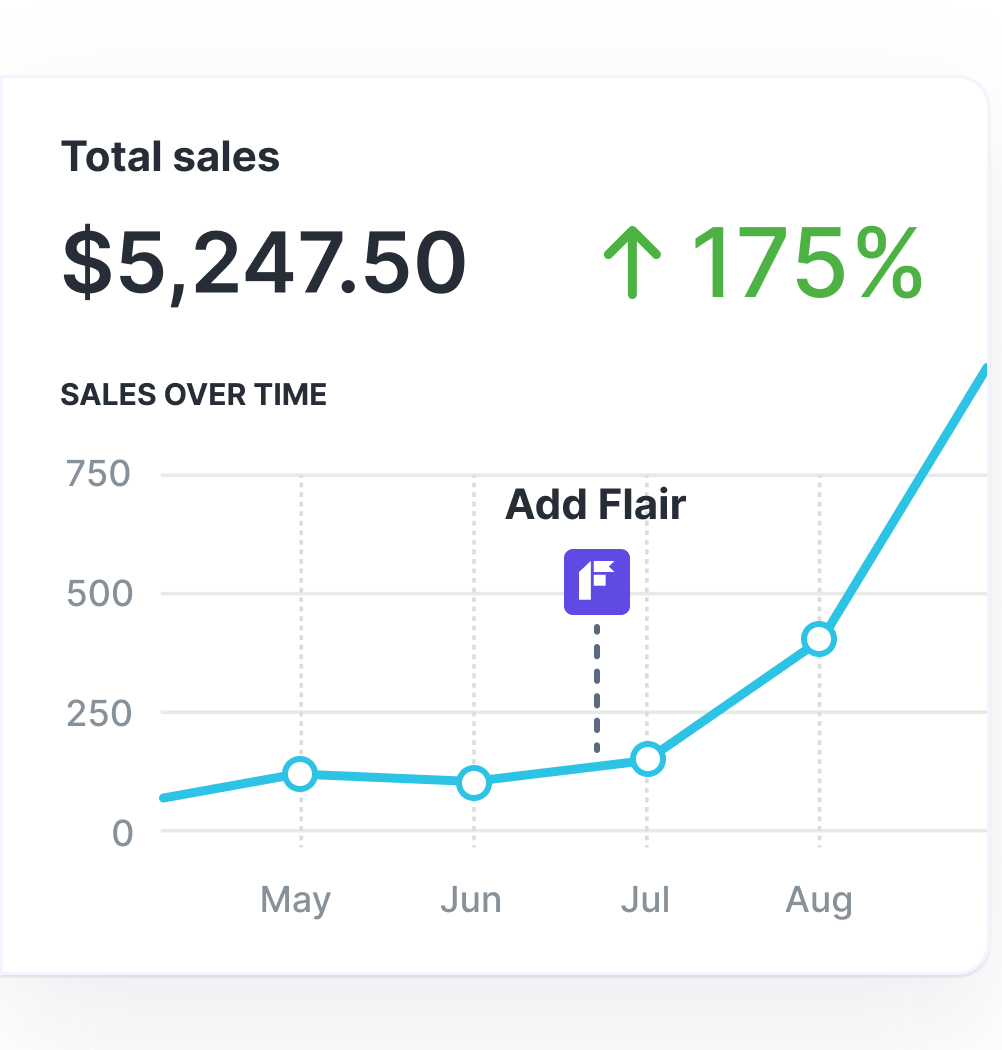
Grow Your Shopify Sales by over 175% with Flair
-
Increase sales using product badges and sales banners
-
Maximize conversions with scarcity, urgency and countdown timers
-
Automate promotions with targeted rules and scheduling
Conclusion
Clearly, there are plenty of ways to skyrocket your Shopify store sales.
Some are quick and easy, like running discounts and promotions, while others require a little more thought (such as analyzing and optimizing your store’s user experience).
We recommend starting with the fundamentals: nail your site structure and build a store that’s optimized for search to build a consistent stream of traffic. Then experiment with additional tactics to convert more of your store visitors into paying customers.
And if you need a little help with that final step, be sure to read our ultimate guide to increasing Shopify conversion rates!