Shopify Dropshipping In 2025: A Guide On How To Efficiently Dropship On Shopify

Shopify is one of the world’s most popular, user-friendly e-commerce platforms. Dropshipping is an accessible way for budding entrepreneurs to start their own online stores.
Together, they’re a match made in heaven — or, at least, that’s the theory.
In this in-depth guide, we’ll explain how dropshipping works on Shopify, how to build and promote your own Shopify dropshipping store, and succeed as a Shopify dropshipper.
Let’s start with the basics…
What Is Dropshipping?
Dropshipping is a form of retail fulfillment whereby the store owner — or “dropshipper” — sells products without actually having to manage the stock themselves. Instead, when a customer places an order, the shipping process is handled by a third-party supplier.

As a dropshipper, your job is to build a brand, promote your store, and curate products your audience will love.
You set the retail price of those products, but your supplier controls how much you pay for them. Each time you generate a sale, the supplier takes their share (this is, effectively, the wholesale price of the product).
Your profit margin, therefore, is the retail price minus the wholesale price and any other overheads, such as the cost of running and marketing your e-commerce store.
Learn more in our guide: What Is Dropshipping and How Does It Work?
How Does Dropshipping Work for Shopify?
We’ve discussed the general principles of dropshipping; now let’s look at how it works on Shopify in particular, from the moment a customer buys something to the point when it turns up:
1. Customer Places an Order on a Shopify Store
The customer stumbles upon a Shopify dropshipping store, finds a product they love — a T-shirt, a corner table, a poster — and pays for it through the store’s checkout process.
2. Store Owner Contacts Their Supplier
At this point, things differ from the “traditional” e-commerce process, because the store owner reaches out to their supplier to notify them of the transaction (which typically happens through automation). This is an essential step as the supplier is the one who handles all the picking, packing, and shipping.
3. Supplier Bills the Store Owner
Having been told about the order, the supplier bills the store owner for the purchased product(s). They typically charge the total wholesale price plus an additional dropshipping fee.
4. Supplier Handles Fulfillment
Finally, the supplier boxes up and ships the product straight to the customer. The store owner is responsible for the sale, but they never so much as touch the product through the whole sales and fulfillment process!
How To Start A Shopify Dropshipping Store: Step-By-Step
Like the sound of becoming a Shopify dropshipper? Here’s how to build and promote your store…
Find a Niche
Think about your favorite brands and e-commerce stores. I bet they sell something specific that aligns with your interests, rather than stocking every product type under the sun.
Simply put, it’s far easier to grow a dropshipping business by targeting a niche — or, even better, a niche within a niche — than it is to thrive as a generalist dropshipper. Sure, you’re targeting a smaller audience than the entire population, but the competition will be lower, making it easier to generate traffic and sales.
The best way to choose a niche is to start with a broad concept — ideally one that aligns with your own interests and knowledge. Then narrow it down, as follows:
| Niche type | Dropshipping store concept |
| Broad niche | Video gaming products |
| Specific niche | Gaming accessories |
| Micro niche | Gaming chairs |
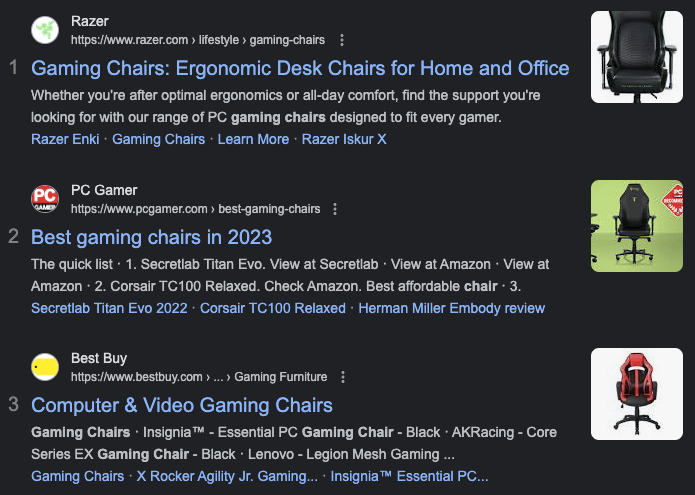
Once you’ve identified a bunch of potential niche ideas, do your due diligence. Check out the competition on Google to see who else is selling or promoting the same types of products…
…and see which content creators are discussing your niche on platforms like TikTok and YouTube:

That’ll give you a better idea of how easy (or hard) it’ll be to gain traction in this area.
If all your competitors are household-name brands and massive social accounts, you might have to niche down further. Either that, or accept it’ll take a lot of time and effort to start generating results.
Name Your Shopify Store
Once you’ve landed on a niche, it’s time for one of the most fun steps: picking the name of your store.
Don’t worry if you’re not really the creative type because there are plenty of helpful tools out there to make the brainstorming process easier. Shopify has its own business name generator…
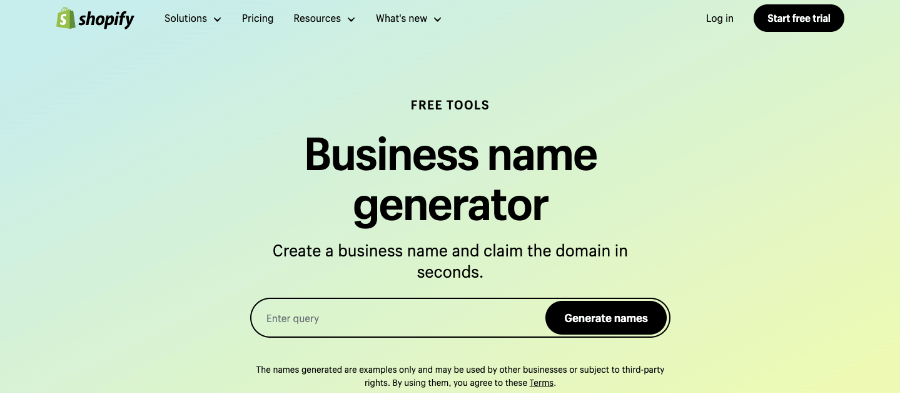
…or you can ask an AI assistant like ChatGPT or Claude to come up with some names for you:
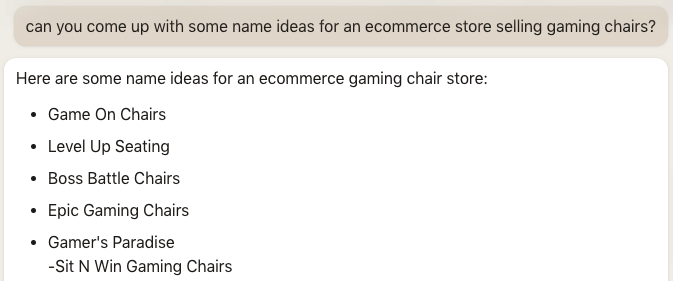
(Don’t forget to Google the results to make sure you’re not copying an existing business.)
Start Your Shopify Free Trial
Having laid the groundwork by picking a niche and a name for your Shopify store, the next step is to join Shopify. Click here to sign up for your Shopify FREE trial.
The free trial should be enough time to build a basic dropshipping store.
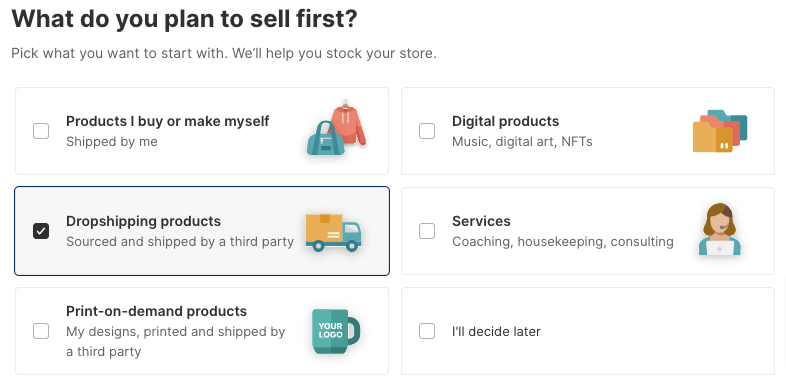
Shopify will ask you a few simple questions about your business type, including whether you’re a newbie or already have an online store, and how you plan to sell to customers. It also wants to know about the types of products you plan to offer at first — tell them you’ll be selling dropshipping products:
Then choose your business location, create a Shopify account, and you’re ready to start building your store.
Connect Your Domain
Your domain name is the address of your website. A good domain name is short, speaks to your niche and brand, and is easy to remember. Getting it right helps you bring more shoppers to your store and boost your search rankings.
Here’s how to connect your desired domain to your new Shopify store:
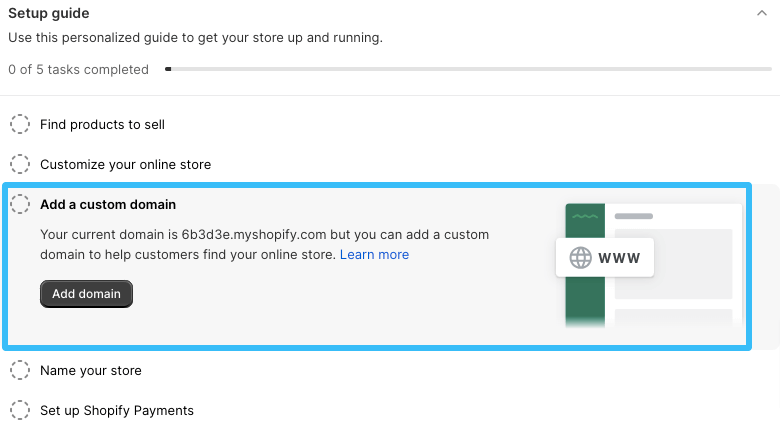
- Log in to your Shopify admin and click Add a custom domain within the Setup guide menu:
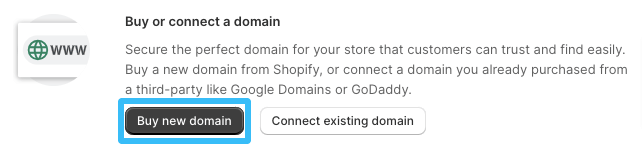
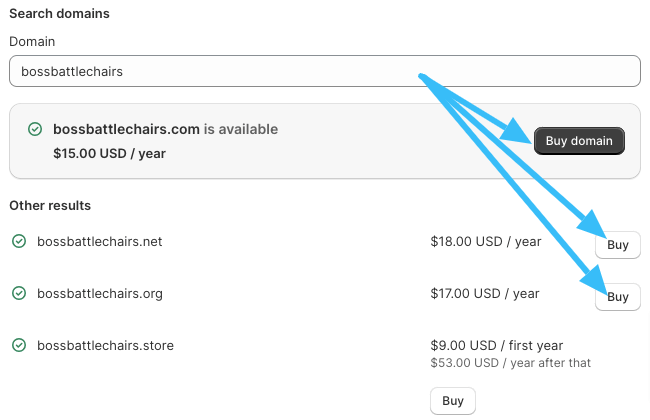
- Click Buy new domain:
- Type your desired domain name into the search box and choose your preferred option by clicking the Buy domain or Buy buttons (note the registration price varies depending on the top-level domain you choose):
- Add your contact information and a valid payment method to complete the purchase
You’re now the proud owner of a shiny, new domain name!
Design a Shopify Dropshipping Store Logo
If you don’t have any graphic design skills, creating a logo from scratch can seem intimidating.
But it needn’t, because Shopify has a free logo maker tool that designs logos in seconds based on a few simple prompts. Just choose your niche…
…then pick your preferred visual style, enter your brand name and slogan (if relevant), and tell Shopify where you’ll be using your logo.
Shopify will use your answers to instantly generate a bunch of potential logo designs:
Scroll through until you find one you like, then click to play around with the colors, fonts, and frames.
Happy? Click Next and download your custom assets, including versions tailored for different use cases:
Alternatively, if all the options look terrible, do it yourself using a free graphic design tool like Canva, or hire a professional to do it for you through freelance platforms like Fiverr and Upwork.
Choose a Shopify Store Theme
Arguably Shopify’s greatest strength as an e-commerce platform is its library of themes, which allow you to customize your store to align with your brand, niche, and audience. The Shopify Theme Store features 161+ professionally designed themes, 12 of which are totally free to use.
Browse themes by logging into your Shopify admin and clicking Customize your online store > Customize theme within the Setup guide menu:
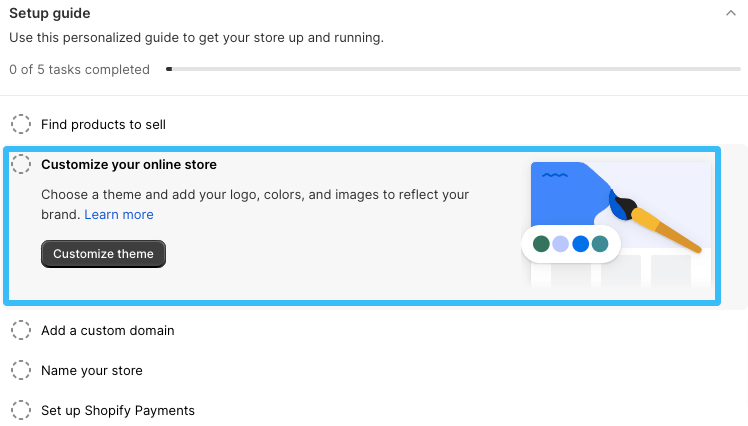
Here, you can browse Shopify’s most popular themes, or click Visit Theme Store to check out the full range.
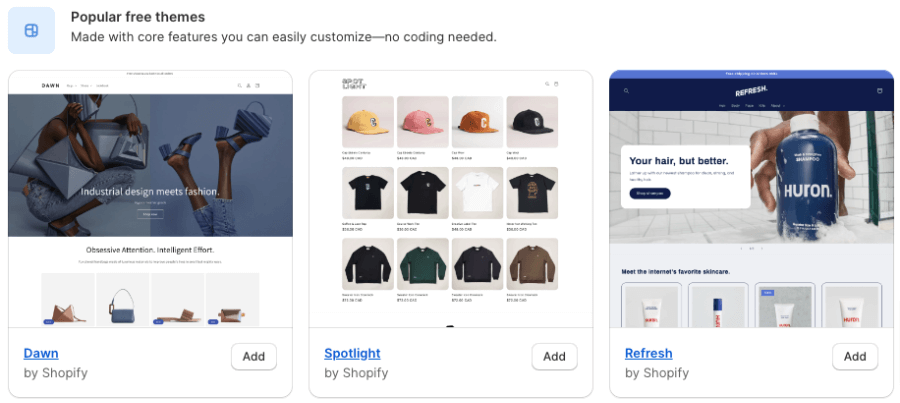
Once you’ve found a good fit, click Add to implement it on your store.
Want to change the theme of an existing store? Check out our guide: How to change Shopify themes without breaking your store.
Choose a Dropshipping Supplier
Without a dropshipping supplier, you’ve got no products to sell. So it’s time to search for a reliable partner (or partners) to join you on your dropshipping journey.
Track down potential suppliers by:
- Searching dropshipping directories like Worldwide Brands and SaleHoo
- Browsing dropshipping marketplaces like Alibaba, AliExpress, and CJdropshipping
- Searching for manufacturers in your niche and reaching out to them directly
- Buying products from other dropshippers in your niche, then using the return address to identify the supplier
- Attending trade shows (this method also allows you to view products in person, which isn’t always possible for dropshippers)
Before you choose a dropshipping supplier, remember the vital role they play in your success.
If they’re uncommunicative, unreliable, or sell low-quality products, it’ll reflect poorly on your store. So be sure to check out their online reviews, read what other dropshippers say about them on forums, and find out about their shipping policies before settling on a supplier.
Import Products To Your Shopify Dropshipping Store
Having found a supplier selling high-quality dropshipping products, your next task is to import those products to your store.
It’s possible to do this in just a couple clicks using automated dropshipping tools (more on them later). But in the early days of your store, you can probably cope with doing it manually by following these steps:
- Log in to your Shopify dashboard
- If you’ve got a CSV full of product names, prices, descriptions, and images, click Import products and follow the instructions to upload them all in seconds
- If not, you’ll need to click Add your products and enter the information one by one:
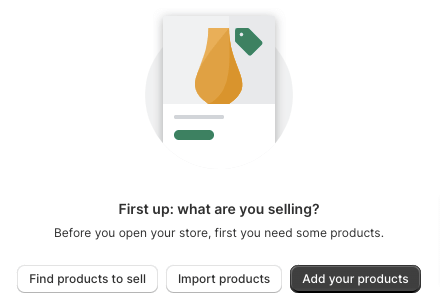
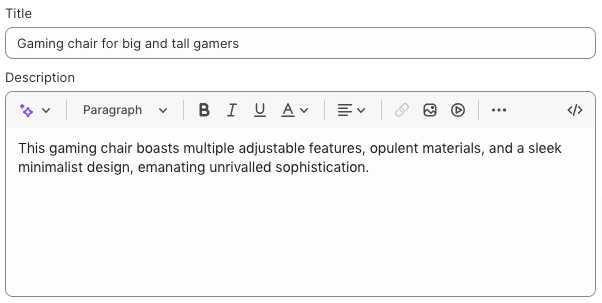
- Write your product title and description:
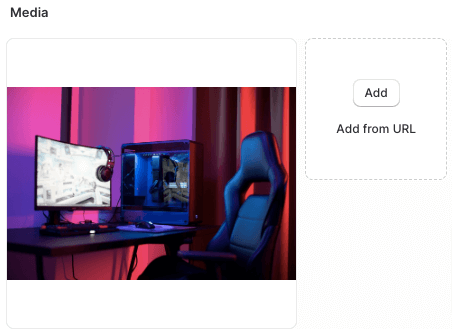
- In the Media section, upload product imagery from your device or copy-paste the image URLs:
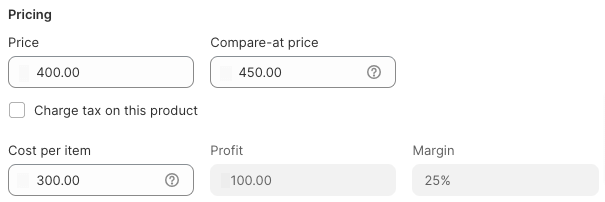
- In the Pricing section, set your product price (and compare at price, if relevant) and add your cost per unit so Shopify can automatically calculate your profit and margin:
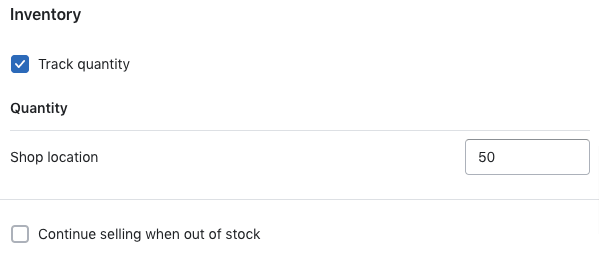
- In the Inventory section, enter the number of units your supplier has in stock. Automation tools can keep this information up to date for you, but if you’re doing it manually, your supplier will be able to tell you the amount. Alternatively, if your supplier makes items on demand, you can uncheck Track quantity.
- While you’re in the Inventory section, create a SKU or barcode to help with inventory management.
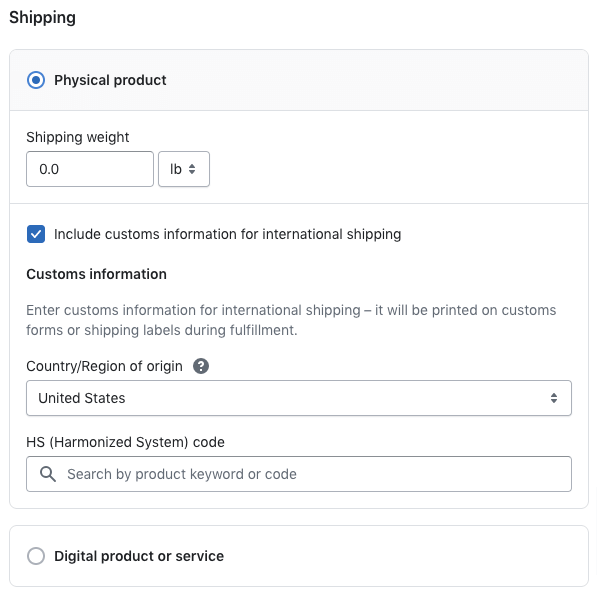
- Under Shipping, enter the weight of your product and whether you want to add customs information for international shipping:
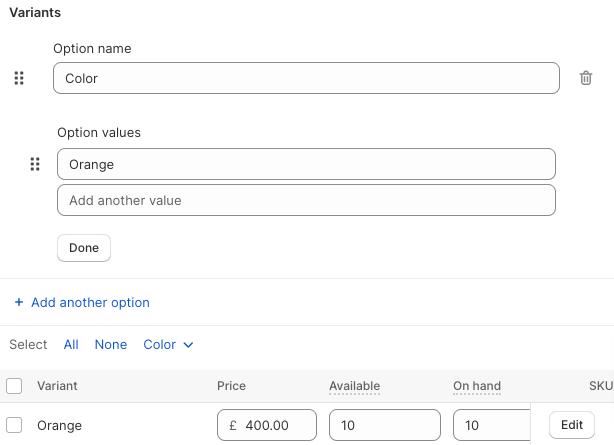
- If relevant, use the Variants section to add size, color, material, or style variants of your product (including unique prices, inventory levels, and SKUs).
- If relevant, add any size, color, material, or style variants in the Variants section. Remember to add pricing details, inventory levels, and unique SKUs for each variant, too.
- Satisfied all your information is accurate? Hit Save to add the product (and any variants, if relevant) to your Shopify dropshipping store.
Optimize the Product Page
It’s not enough to simply list a bunch of products on your store and hope customers will buy them; you need to close the deal. That means optimizing your product pages.
For starters, Shopify lets you view the search engine listing for each product within the Add product screen. Here’s how it looks for the product we added in the previous section:

Optimize it by adding keywords to the title (i.e. the blue bit) and the description. And make the description actionable by adding a CTA to boost your click-through rate.
Next, it’s time to level up our product description. Chances are you’ll be given a standard description from your supplier, but there’s almost certainly room for improvement.
Read through the feature list provided by the supplier, then break them down into bullet points that explain the benefits of buying this product. For instance:
- Feature: Adjustable lumbar support and contoured design
- Benefit: Promotes proper spinal alignment, which is essential for maintaining a healthy back
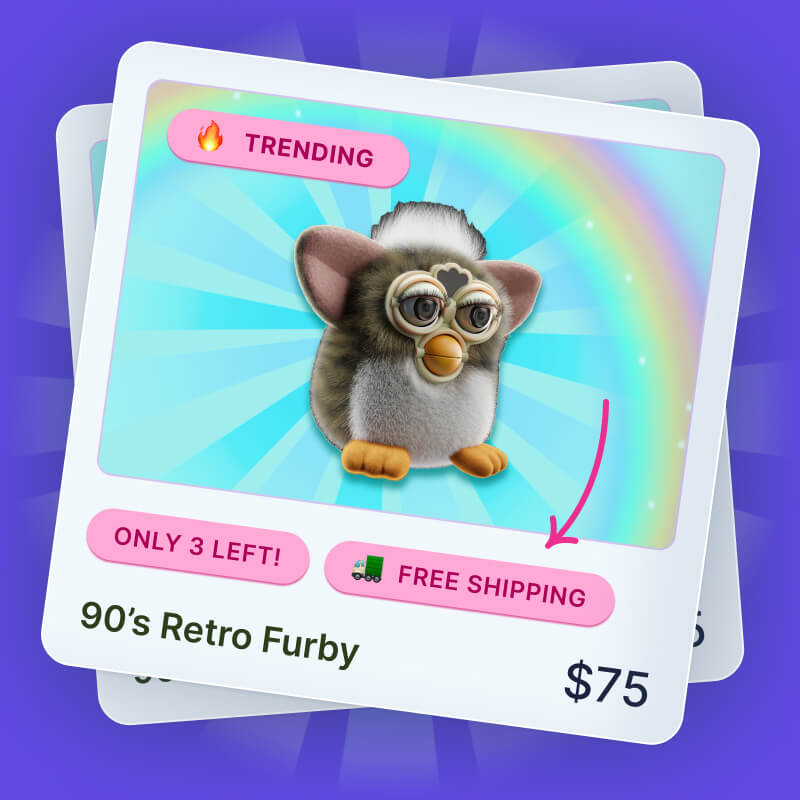
Now, let’s dig into a real-world example of a well-optimized product page, courtesy of office and gaming chair brand Hinomi:
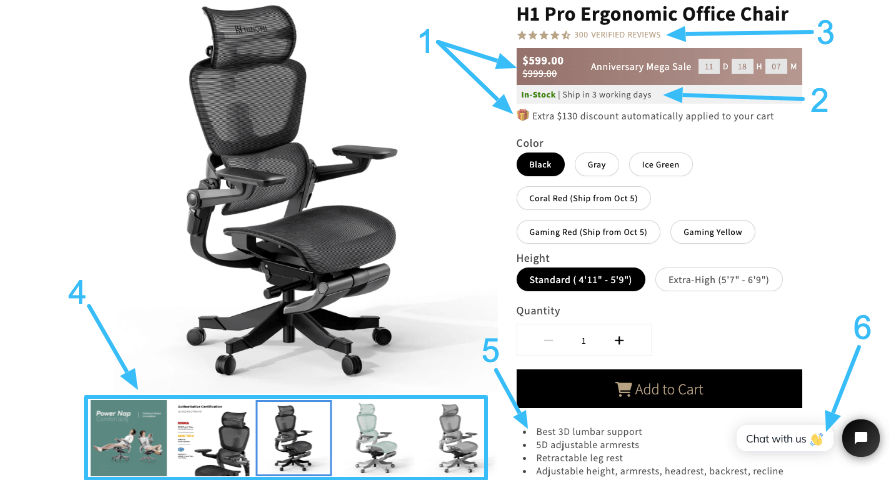
- List promotional information, like free shipping and discounted pricing, in a prominent position.
- Add shipping information so customers know when they can expect their product to arrive.
- Show a review score and link to real-world reviews (dropshipping marketplaces like AliExpress allow you to import reviews from the platform to your own store).
- Include multiple product images to show different angles and people using the product.
- Share the product’s key selling points in bullet point form.
- Add a chat feature to your store to help customers choose the right product. There are 200+ live chat apps in the Shopify App Store.
Sure, optimizing every product page on your dropshipping store is pretty labor intensive. But it’s one of the most effective ways to boost your Shopify conversion rate, so it’s worth the effort.
Customize Your Shopify Store Homepage
While we’re discussing the process of customizing your Shopify dropshipping store, let’s look at another vital part of your site: the homepage.
Chances are, a significant proportion of visitors will land on your homepage. Once arrived, it’s your job to win them over with your aesthetics, explain who you are and what you sell, and guide them toward relevant products.
To update your homepage, log in to your Shopify admin and navigate to Online Store > Themes, then click Customize:
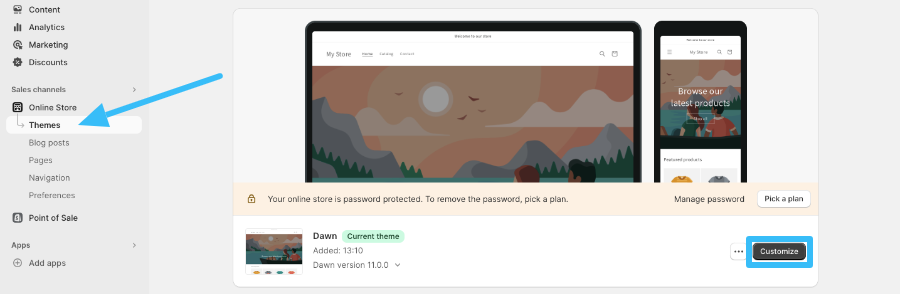
That’ll bring you to the theme customizer screen…
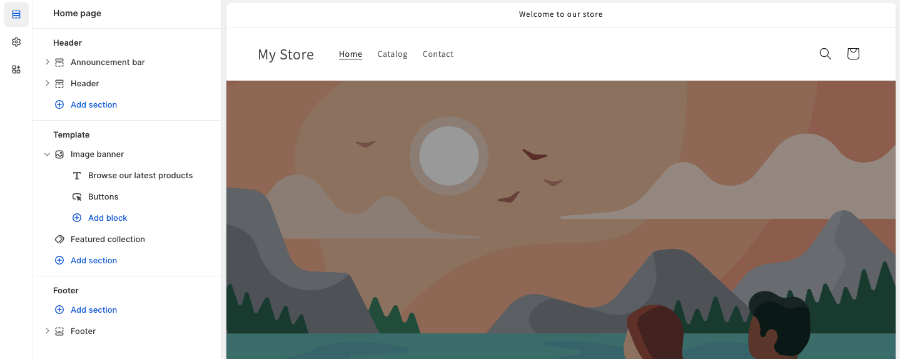
…where you can:
- Add an announcement bar to the top of the page to welcome customers to your store, like to your best products, or promote eye-catching offers
- Update the style and contents of your header menu, including adding your brand logo
- Upload a hero image banner
- Change your heading copy and CTA buttons
- Choose which products to feature
- Add an email capture form
Remember, the goal of your homepage is to steer visitors deeper into your site — that’s where the money is! So don’t overwhelm them with copy.
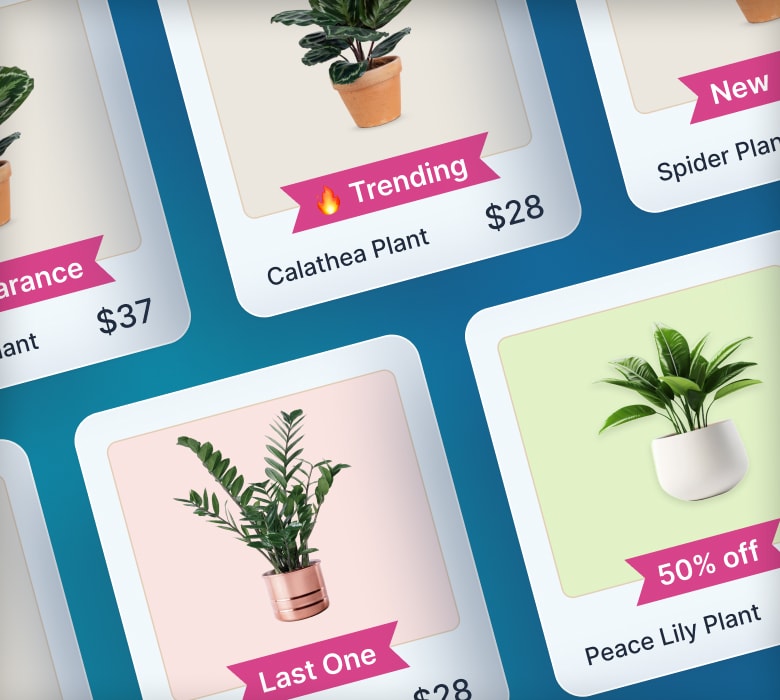
Learn How to Double (2X) Your Shopify Sales with Product Labels
-
Boost sales by highlighting key features with product badges
-
Increase conversions by promoting scarcity, urgency and social proof
-
Sell more with targeted promotions to increase average order sizes
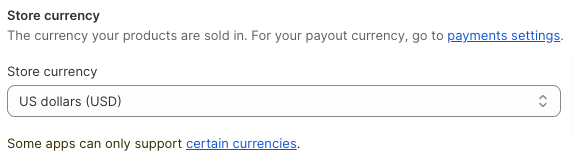
Choose Your Shopify Store Currency
Follow these steps to choose the currency of your Shopify dropshipping store:
- Log in to your Shopify admin.
- Click on Settings at the bottom of the left-hand menu:

- Scroll down to the Store currency section and choose your desired:
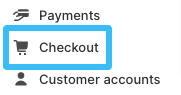
Configure Your Shopify Checkout Settings
Next, let’s tweak your store checkout to ensure you’re capturing all the necessary customer information (while also making it quick and easy for shoppers to buy). Here’s how:
- Log in to your Shopify admin.
- Click on Settings at the bottom of the left-hand menu:
- Navigate to Checkout in the left-hand menu:
- In the Customer contact method section, choose which method(s) customers can use to check out — phone number or email, or just email:
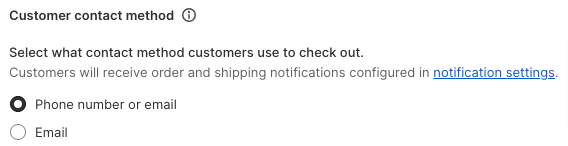
- Also in this section, choose whether or not the customer needs to log in before starting the checkout process:

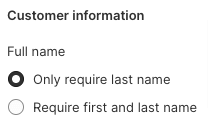
- Next, scroll down to the Customer information section and tell Shopify which customer details you want to capture during checkout (full name or just last name? Shipping address phone number? Address second line? The choice is yours!).
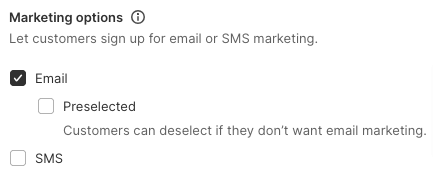
- Under Marketing options, choose whether to ask customers if they want to sign up for your email and/or SMS marketing lists:
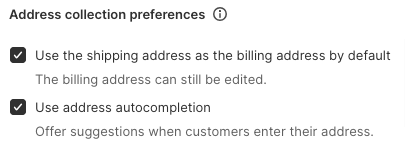
- In Shopify address collection, speed up the user journey by ticking the options to use the shipping address as the billing address by default and use address autocompletion:
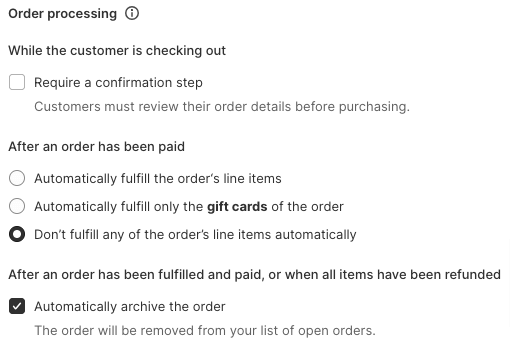
- Finally, under Order processing, select whether to add an order confirmation step, choose what to do after the order has been paid, and decide if you want orders to be automatically archived after payment and fulfillment:
That’s it — your checkout is now ready to start processing customer orders!
Generate Shopify Store Policies
From returns and refunds to privacy and terms of service, your Shopify store needs various dull-but-important policy pages that, essentially, show customers you’re legit.
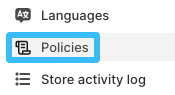
Mercifully, you don’t need to create all of these pages from scratch, because Shopify offers a bunch of pre-written templates. Access them by logging into your Shopify admin, navigating to Settings, and clicking Policies in the left-hand menu:
Once there, you’ll see all the available policy types, which can be automatically added to the footer of your checkout and your store navigation. In full, those policy types are:
- Written return and refund policy
- Privacy policy
- Terms of service
- Shipping policy
- Contact information
To automatically generate your copy, just click Create from template beneath the relevant policy page…
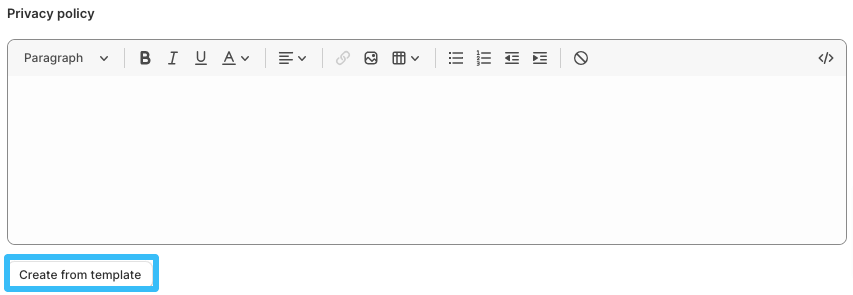
…then edit the text as necessary.
Bear in mind Shopify’s templated pages don’t constitute legal advice, so if you’re unsure about anything, be sure to run it past a professional.
Edit Your Shopify Store Navigation Menu
The easier it is for shoppers to move around your store, the more likely they are to find what they’re searching for — which means more sales. And the best way to streamline the user journey is to build an intuitive Shopify store navigation menu.
Most Shopify stores have two such menus: a main store navigation menu at the top of the page…
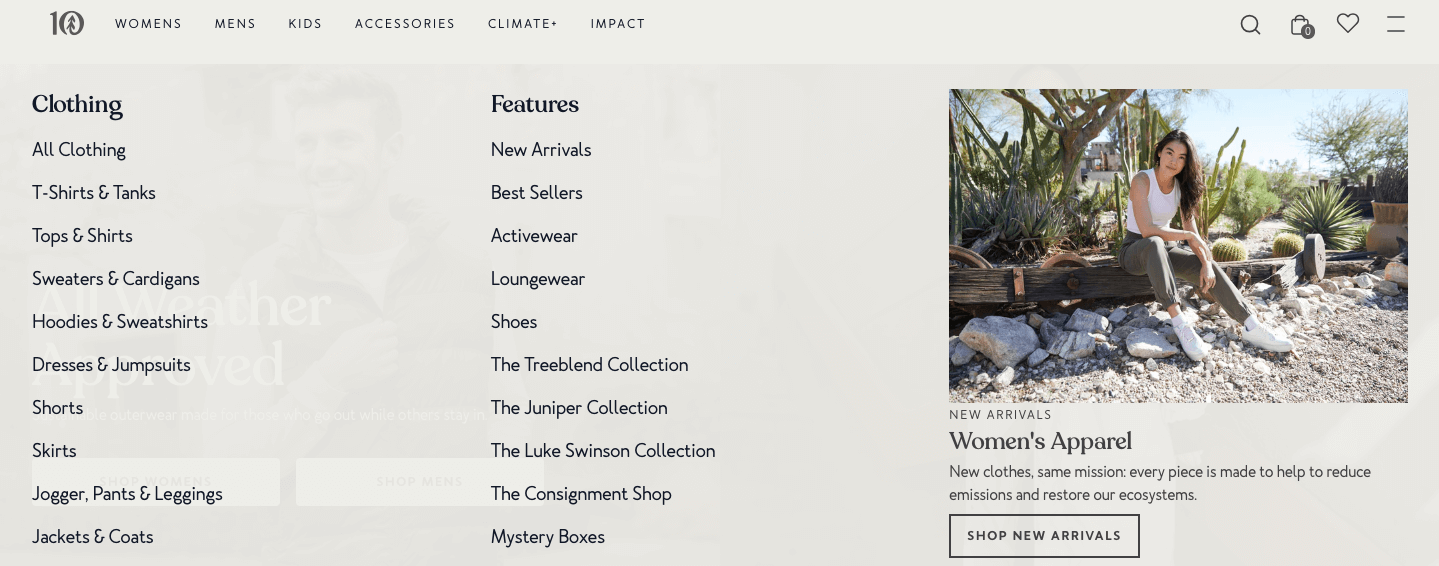
…and a secondary menu in the footer:
Your goal is to segment all of your dropshipping products into logical categories and, if necessary, subcategories. For example:
- Gaming chairs
- Racing seats for gaming
- Leather racing seats for gaming
- Racing seats for gaming
Once you’ve cut and sliced your inventory, add your new categories to your main store navigation by following these steps:
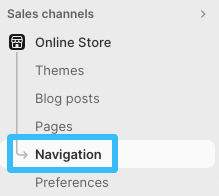
- Log in to your Shopify admin and navigate to Online Store > Navigation in the left-hand menu:
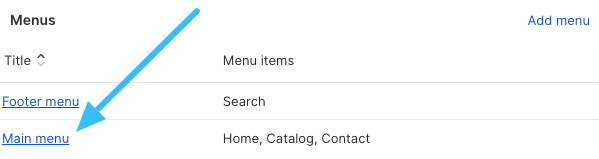
- Click Main menu:
- Select Add menu item:

- Name your new menu item and link to the relevant URL on your site:
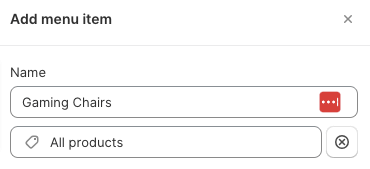
- Click Add and Save menu to add the new item.
Repeat this process for all the other category and subcategory pages you need to add — then do it again for your footer menu. You’ll also need to do this in future if you add new categories to your store.
Configure Payment Providers
Last but not least, you need to give customers a way to pay for your dropshipping products, which means configuring the payment system:
- Log in to your Shopify admin.
- Click on Settings at the bottom of the left-hand menu:
- Navigate to Checkout in the left-hand menu:
- As long as you’re based in a country where Shopify Payments is available, your best option is to click Activate Shopify Payments:
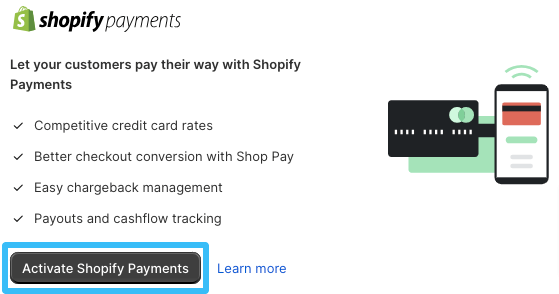
- If you haven’t already, you’ll need to provide a bunch of information about your business — your name, address, contact details, etc. Follow the prompts to set up Shopify Payments.
Alternatively, if Shopify Payments isn’t an option in your location, you’ll need to choose from the list of third-party providers and request to add their payment method to your store.
Congratulations, your store is all set up to start selling products and receiving payments!
However, you’re unlikely to generate many sales if no one but your mom knows your store exists. So it’s time to think about your marketing plan…
Promote Your Shopify Dropshipping Store
There are lots of ways to promote a Shopify store. Here are some strategies to consider:
SEO
Search engine optimization (SEO) takes a long time to yield results, with Ahrefs analysis revealing that only 5.7% of all web pages rank in the top 10 search results for at least one keyword within one year of creation.
But it’s worth the effort because organic search is the highest-converting traffic channel for e-commerce stores.
While SEO is basically never finished, most Shopify stores will yield the best results by prioritizing these areas:
- Optimizing key pages (e.g. homepage, collection pages, product pages) to target relevant keywords
- Using Google’s PageSpeed Insights tool to identify ways to speed up your website’s page load speed
- Building backlinks from authoritative websites to your store
Content Marketing
Content marketing isn’t a traffic source in its own right. Rather, the content you produce can bring in visitors from multiple channels, including organic search, paid search, social media, and email.
It’ll also help with your link-building efforts: the more high-quality, original content you create, the more other websites will link to you.
“Content” refers to everything from social posts to webinars to e-books. But the most valuable content formats for Shopify dropshippers include:
- Blog posts that speak to a common customer pain point, collate your best products, or explain how to get the most value from your products
- Customer testimonials that highlight your products’ biggest features and benefits
- Social media images and videos that showcase your brand personality and products
Online Advertising
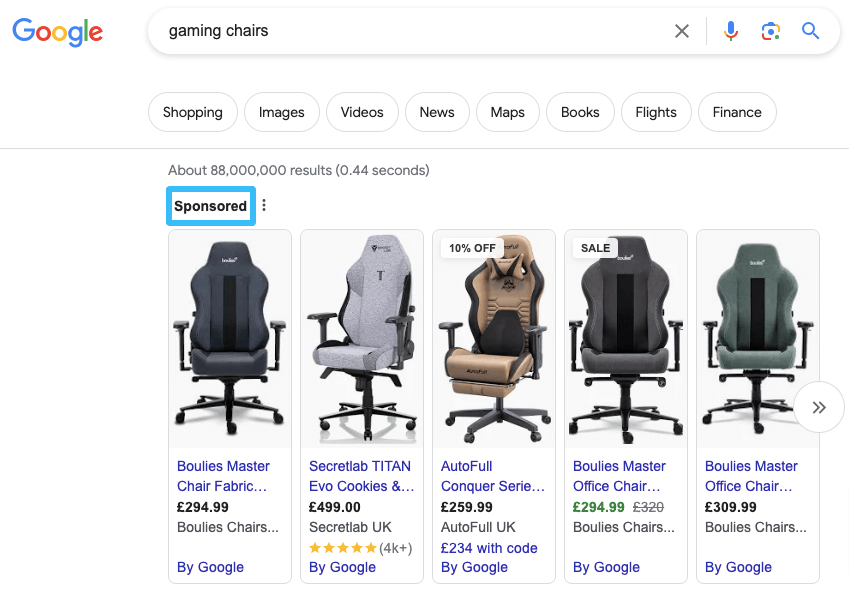
Whereas SEO is a “free” source of traffic, online advertising involves paying to bring visitors to your site. It comes in two main varieties: paid search ads, as denoted by Google’s Sponsored tag…
…and social media ads:

Both can be extremely effective at generating traffic to your site without waiting for your key pages to start ranking on Google.
However, costs can rack up fast. For instance, the average cost per click for Google Ads stands at $4.22. Margins are tight in many dropshipping niches, so you’ll need to keep a close eye on your spending to ensure your campaigns are sustainable.
Email Marketing
Email marketing is highly cost-effective, delivering an average return of $36 for every $1 spent.
Email is also the best converting channel in Shopify stores, with an average conversion rate of 4.29%.
But, like SEO, email is a slow burn. Unless you already have a marketing list with thousands of names on it, you’ll need to build one from scratch — and that takes time.
Your best bet is to add email capture popups and forms to high-traffic pages on your site:
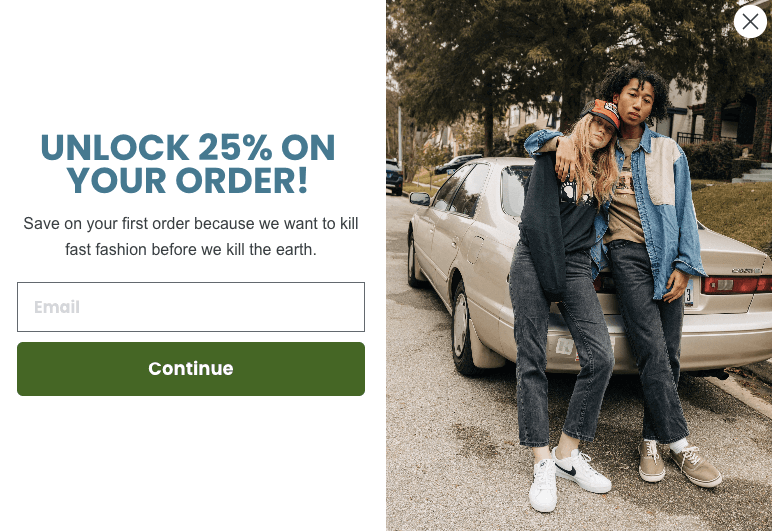
Make sure you give customers a compelling reason to hand over their email address, such as free shipping or a discount on their next purchase.
Social Media Marketing
Given their huge, captive audiences, social media platforms are excellent places to promote your brand and products.
Unless you have lots of time on your hands or a huge marketing budget, you’ll need to focus on just one or two platforms. To help you choose the right ones for your brand, niche, and audience, we’ve analyzed the most popular social platforms for e-commerce stores:
| Platform | Audience | Best for… |
| Men and women aged 25 – 34 | General broad niches | |
| Men and women aged 18 – 34 | Fashion, beauty products, home decor, travel | |
| Women aged 25 – 34 | Art, home decor, women’s fashion | |
| TikTok | Men and women aged 18 – 34 | Home decor, health and beauty, apparel and accessories |
| YouTube | Men and women aged 25 – 34 | Gaming, home & DIY, travel, fitness, cooking |
Learn more in our guide to Ecommerce Marketing Strategies for Success.
Best Practices for Shopify Dropshippers
By this point, you know how to build and market your Shopify dropshipping store. Now, let’s take a look at some best practices to help you manage it effectively…
Leverage Your Supplier Relationships
Simply put, the success of your dropshipping store is largely down to the relationship between you and your suppliers. Don’t be afraid to lean on them for support, whether you’re tracking down the status of an order or requesting imagery for a new product.
Focus On Customer Support
Once you’ve built your e-commerce store, you’ve got two main areas to focus on: marketing and customer support.
While it’s tempting to focus solely on growing your customer base, don’t shirk the customer service element. After all, 52% of Americans are happy to pay more if they know they’ll receive great customer service.
Respond promptly to customer queries, chase up late orders with suppliers, and consider implementing resources like an FAQ section and an AI-powered chatbot to maintain basic service levels even when you aren’t available.
Search For Dropshipping Automation Tools
From importing products to sending customer information to your suppliers, dropshipping is full of tedious, time-consuming, but essential tasks. Fortunately, the Shopify App Store contains plenty of automation tools that can do all the boring stuff for you.
Popular dropshipping apps include:
| Tool | Price | What does it do? |
| AutoDS | From $26.90/month |
|
| Dropified | Free to install; paid plans start at $49/month |
|
| Duoplane | Free to install; subscriptions start at $299/month |
|
Sure, all of those tools cost money — and dropshipping margins are pretty tight to begin with.
But while you might be able to cope without them in the early days of your store, once the orders start pouring in, you’ll definitely want to set up some automations to ease your workload.
Is Shopify Good for Dropshipping?
With its relatively low-cost plans, user-friendly interface, and vast library of apps, Shopify is a popular choice for dropshipping. So it’s no surprise that 12.82% of Shopify stores sell at least one dropshipping product.
Let’s take a look at what brings all those dropshippers to the e-commerce platform…
What Are the Benefits of Dropshipping on Shopify?
- Low startup costs: You can get started by signing up for Shopify Basic, priced from $29 per month.
- Low risk: Because you don’t have to buy your store inventory, starting a Shopify dropshipping store isn’t going to bankrupt you, even if you don’t generate many (or any) sales.
- Minimal overheads: Your supplier pays for inventory storage and fulfillment, so you just need to cover the costs of maintaining your Shopify store.
- Access a wide product range: You can sell pretty much any dropshipping product, provided it doesn’t breach Shopify’s terms of service.
- Easy to scale: Expanding into new markets or launching new product ranges doesn’t require any additional investment or planning — it’s all down to your suppliers.
How Profitable Is Shopify Dropshipping?
There’s no definitive answer to this question, but we’ve rounded up a few authoritative sources to give you some idea about the earning potential of dropshipping on Shopify:
- BlueCart says the average dropshipper sees margins of 20% – 30% from each sale
- Gelato claims most Shopify dropshippers earn between $1,000 and $5,000 per month on average
- ConvertOut says Shopify dropshipping stores can expect margins of 10% – 20%
Ultimately, your profitability will depend on your niche, customer acquisition costs, and how much you pay your suppliers for products. If you generate a high volume of sales, you may be able to negotiate cheaper wholesale prices, increasing your profits.
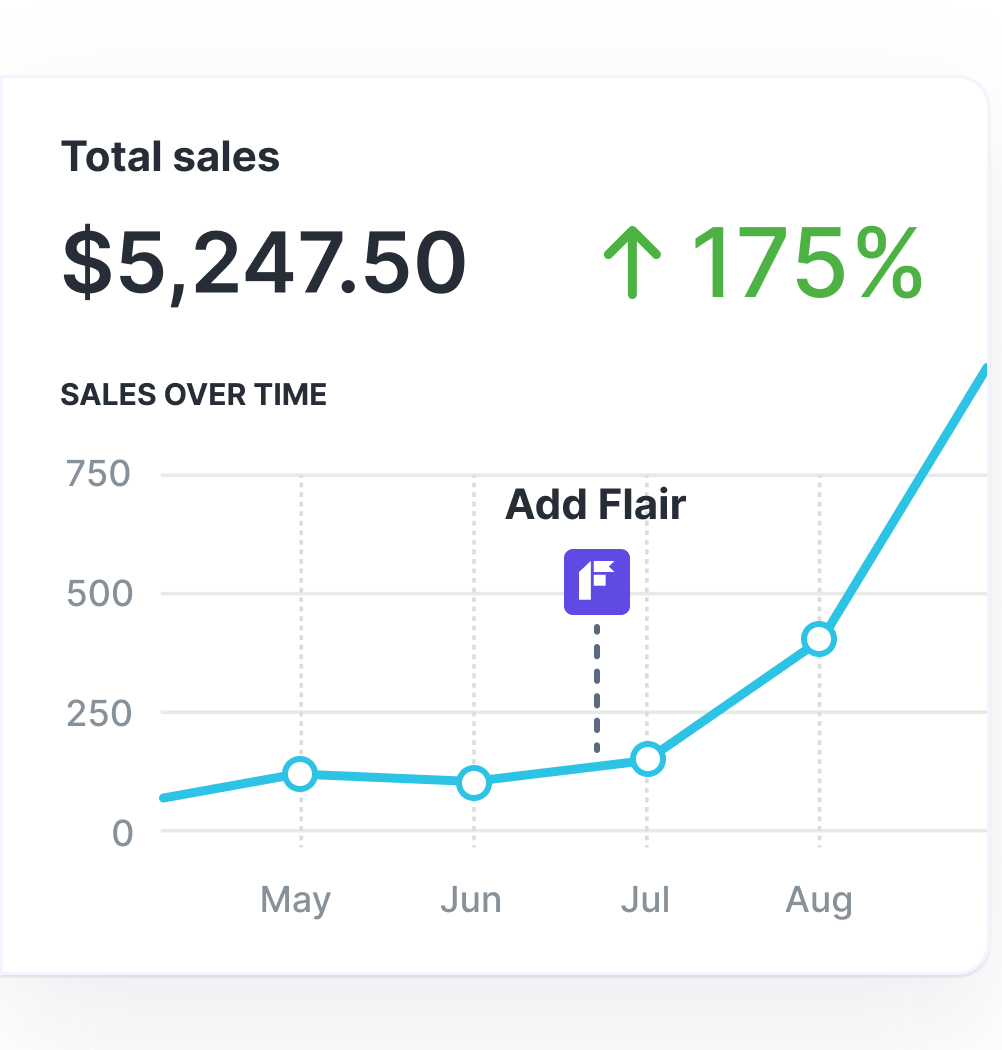
Grow Your Shopify Sales by over 175% with Flair
-
Increase sales using product badges and sales banners
-
Maximize conversions with scarcity, urgency and countdown timers
-
Automate promotions with targeted rules and scheduling
Shopify Dropshipping FAQ
Is Shopify Dropshipping Worth It Today?
Yes! Dropshipping is worth it today if you’re looking for a low-risk, low-cost way to start an e-commerce business. Search activity around the term “dropshipping” has doubled over the past five years, so there’s no shortage of interest. If you choose the right niche, work with quality suppliers, and nail your marketing, dropshipping can be highly profitable (and enjoyable).
Is Shopify Basic Enough for Dropshipping?
Yes! You can build and manage a dropshipping store with a Shopify Basic subscription, priced from $29 per month. However, if you want to add more staff accounts, unlock more advanced reporting, and enjoy lower credit card rates, it might be worth upgrading to a Shopify Plan (from $79 per month) down the line.
Can You Dropship Anything on Shopify?
You can dropship pretty much anything on Shopify, but bear in mind the platform prohibits products and services in certain categories, including:
- Alcoholic beverages
- Products containing components from endangered species (e.g. mother of pearl buttons)
- Batteries
- CBD products
- Cosmetics and beauty items containing hazardous materials
- Drugs and drug paraphernalia
- Explosives and weapons
What Do You Need To Start Dropshipping on Shopify?
To start dropshipping on Shopify, you need:
- A Shopify Basic subscription (or a higher-tier subscription)
- A dropshipping supplier
- An e-commerce store
And that’s it! However, as your store grows, you might consider investing in other areas, such as dropshipping automation tools to streamline the fulfillment process and a chatbot service to handle customer support.
How Much Money Do I Need To Start Dropshipping on Shopify?
Starting out as a Shopify dropshipper requires relatively little money: you just need to cover the cost of buying a domain domain and building an e-commerce store. Expect to pay around $15 per year for a domain name, while a Shopify Basic subscription costs $348 annually (or you can pay monthly for $39 per month).